A Wine Bottle Gets a New Life
That's right, my friends. Don't toss your old wine bottles until you see this transformation. You may remember the Wine Bottle Torches (that are perfect for your outdoor space) that I made last summer and my use of the rest as a vase. That part needed an improvement, so let me show you what I did.
Welcome to the Creative Craft Hop hosted by Donna from Modern on Monticello this month. If you just came from Sara @ Birdz of a Feather, welcome to the Cottage! At the bottom of this post I'll direct you to the next stop on this hop, but be sure to visit all of the other stops for some amazing inspiration. They will all be listed.
Now, back to my wine bottle.
A 1.5 liter wine bottle.
The large one that you share with friends!
Once you drink the wine, rinse it out, and remove the label, it's time to cut the bottle.
This post may contain affiliate links.
This bottle cutter does a great job, but to be perfectly honest, bottle cutters do not actually cut the bottle. They etch the glass so it will break. Take a peek:
The method I use involves chilling the bottle in the refrigerator and using a candle flame and a bowl of ice water to break it along the etched line. The process is described in detail in the Wine Bottle Torch post.
After breaking the bottle and sanding the edges, this is what I had:
The bottom of the bottle is about 6" high, just perfect for a small vase. But it was boring, so the process continued!
I bought some 1" copper tape.
I wanted to cover the cut edge, so I measured from the top edge and made a mark all the way around the bottle.
Peeling off the backing, I carefully applied the tape to the bottle.
Not careful enough! As you can see, it started to wrinkle. Fortunately, I was able to lift the tape and smooth it down.
Then smoothed it over the edge and to the inside.
Smoothing it with the handle of a paintbrush.
I wasn't thrilled with the wrinkled edge and inside. Snipping it may have helped but the real problem is the fact that the glass used for wine bottles is not the same thickness all the way around. Behold:
Oh, the challenges we DIYers face!
Not to be discouraged, I ordered some more copper tape because I had another bottle that had been cut.
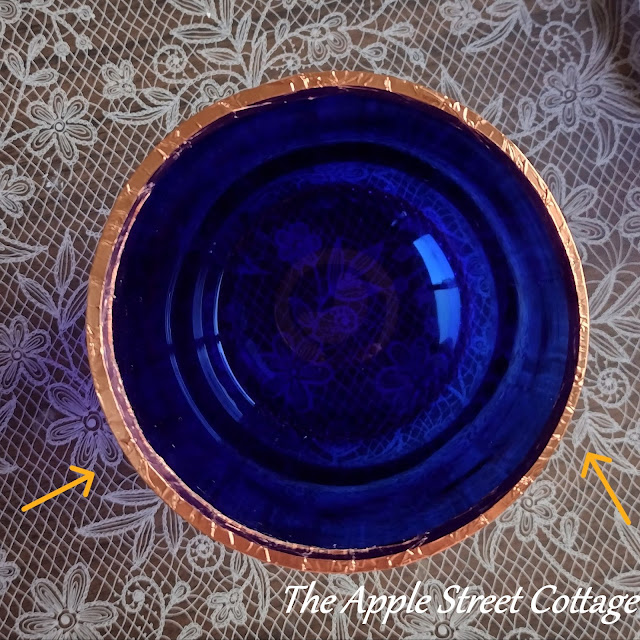
The different widths give you lots of options...and I love options!This time, the 0.3 inch copper tape was applied along the top edge.
Nice and smooth without the edge being covered. Here's a peek at the two:
But, I still had one more trick up my sleeve - and one more 1.5 liter wine bottle! I cut some of the 1-inch copper tape into 1-inch squares.
Placed them around the edge.
Trimmed...
...and smoothed down.
Three options:
There are other options in addition to these 3:
- a stripe around the bottom,
- horizontal stripes
- diagonal stripes
- vertical stripes
- a checkerboard effect
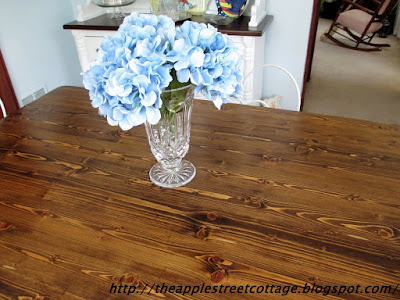
Besides, they look pretty just the way they are, with flowers in them.
Here are some of my other wine bottle projects:
Don't forget this is a hop so it's time to visit Niki @ Life as a LEO Wife. Once you've stopped by to see her, be sure to visit all of the others for more inspiration! Here's the list:
Featured at:


You did it! Your wine bottles look amazing Ann; love all the options too! I've done stained glass, but have to admit I've never cut a bottle. Have always wanted to venture into that territory; maybe now I will!
ReplyDeleteYes, I did! Cutting bottles is actually easy. The more I do it, the more I enjoy it!
DeleteI love this technique using the copper tape, Ann! Who would have thought to do this - you did! I've always been leery of cutting glass but you make it seem so easy and safe! Thank you!
ReplyDeleteThank you so much, Gail. It really is a simple process...and I always wear safety glasses - just in case!
DeleteI have worked with bottles before but never like this. They look great Ann. Love it!
ReplyDeleteIt's a lot of fun, Terrie. You should give it a try!
DeleteYour bottles turned out lovely Ann, somehow I feel if I tried this project it would end in disaster. I have cut glass before, but never a bottle. I find that a bit intimidating. Years ago I took a stain glass class, and I loved it. I would love to get back into that again. Maybe you have inspired me to do so. Have a wonderful week my friend!
ReplyDeleteThank you so much, Cara. You could totally do this - give it a try!
DeleteI have always wanted to try using a bottle cutter. You make it look super easy. Plus, these are gorgeous!!! Great job. Thanks so much for sharing.
ReplyDeleteIt is easy, Tammy. Give it a try. You won't regret it!
DeleteI love bottle crafts Ann, and yours turned out so beautiful with the copper tape~ The color combo of blue and copper is so pretty. I've never had the courage to cut a bottle, I need to try that! Your vases look great filled with flowers, no one would ever guess the vases were old bottles!
ReplyDeleteJenna
You definitely need to give it a try, Jenna. There are so many things you can create with a bottle. The nice thing about these vases is that if they break it's no big deal. Just drink another bottle of wine!
DeleteThe copper and blue combination is so classy and beautiful. Absolutely lovely update, Ann.
ReplyDeleteThank you so much, Rachel. Blue really is my color and I absolutely love the color of these bottles!
DeleteI love how striking that copper is against the blue! These are all fabulous options.
ReplyDeleteThank you , Joanne. I really love the look too!
DeleteWhat a great way to recycle pretty wine bottles. I have always love blue ones and it looks so pretty with the copper.
ReplyDeletewww.chezmireillefashiontravelmom.com
Thank you so much. Blue is my favorite color so when I saw blue wine bottle, it was destiny!
DeleteVery pretty, Ann! I love the way the copper tape looks paired with that blue glass. It's really stunning...and thanks for all the tips. Super helpful!
ReplyDeleteThanks, Kim. I think the copper tape is a great addition to the blue bottle. You know how I feel about blue......
DeleteClever idea and the perfect color bottles to use for this project!
ReplyDeleteThank you, Patti. These blue bottles are my favorite!
DeleteSo pretty.
ReplyDeletewww.rsrue.blogspot.com
Thank you!
DeleteHow clever and I love the finished product. Thanks for sharing at #weekendtrafficjamreboot and have a lovely weekend. x
ReplyDeleteThank you so much!
DeleteAnn,
ReplyDeleteThanks so much for your visit and for your prayers... It has been gratefully appreciated....As you know, Joe passed away peacefully and comfortably in a Hospice Unit on April 16th...
Hugs,
Deb
Debbie-Dabble Blog
You've been on my mind since you first announced Joe was ill. Please take care of yourself, Debbie.
DeleteSending you a giant virtual hug! XO
Ann, what a beautiful blue wine bottle for this project. We have so many empty wine bottles that go to the recycle bin. I love your tenacity in getting the pretty copper tape just right.
ReplyDeleteThank you, Carol. Blue is my favorite color and I always love a project that involves recycling/upcycling!
Delete