Posts

Showing posts from August, 2020

This & That: End of Summer 2020

Image
Summer 2020 will soon come to a close and, let's face it, like the beginning of the year, it's one for the record books.  Yard Sales and Estate Sales have been sporadic, but I have managed to find some treasures.  Let's start with them..... My 'Fairy Godmother' started me off in May with Yard Sale Finds Without the Yard Sale  and a few of those projects have already appeared: The Oak Footstool The Chair Table Gossip Bench Makeover What Do You Do With a Legless Chair? And there are more projects to come from that haul, so stay tuned!   But my Fairy Godmother's generosity did not end there.  In July, I found this mirror on my front porch: I'm currently working on it and you won't believe the story behind it.  It should be done soon and there will be a new post about it.   I saw this silverware box listed on a garage sale site and got it for $5.  The outside of the box has some damage, but it will be fixed and the box repurposed.  Since I've already mad

What Do You Do With a Legless Chair?

Image
  You upcycle it, of course!   This idea has been rolling around in my brain for quite a while, so when I was gifted this Pile of Goodies I knew it was time to try it....I wanted it to hang! If you look carefully at the picture, you can see that the chairs were not only legless, but the one had a crack that went completely through the seat.  This was nothing some glue, clamps, and giant rubber bands couldn't handle though.  I thought about leaving them 'as-is' in all their 'chippy goodness', but there were some other colors mixed in that I couldn't live with - yellow, red, and black, so I sanded everything smooth and gave them a coat of primer. As of this time, only one of the chairs has been upcycled.  The other is sitting in the basement until winter is here and I need a project to work on.  That being said, one chair was painted pale blue/green and since this chair was going to hang, I drilled 2 holes in the seat for ropes:   I wanted to paint a flower on t

Rosie in the Summertime

Image
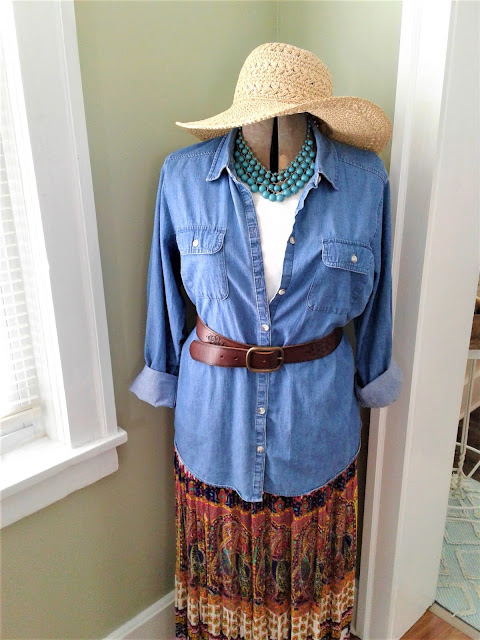
  Hello again!  It's me, Rosie and I'm back to share all the latest news.   The pandemic still isn't over and everyone around here stays home a lot, but they have gardens!  The flowers are beautiful and the vegetable garden is producing lots of tomatoes, lettuce, zucchini, beans, and more.   I was told I should be helping with harvesting (whatever that means) and I needed to change my outfit.  Fine with me - if you remember my last outfit of   OR Scrubs , it wasn't my best look!  So, I insisted it be cute and this is what Ann pulled out of the closet: Well, in all honesty, she started out with the skirt and a white t-shirt.  The skirt is definitely a win, but the shirt?  Pretty boring.  Back to the closet where the chambray shirt and belt were added....now we're talkin'! I DO love the leather belt, even though it's a 'little' too big for me.  Clearly someone has a smaller waist around here.........don't you dare tell anyone I said that! Some jewe

The Grapevine Wall Planter

Image
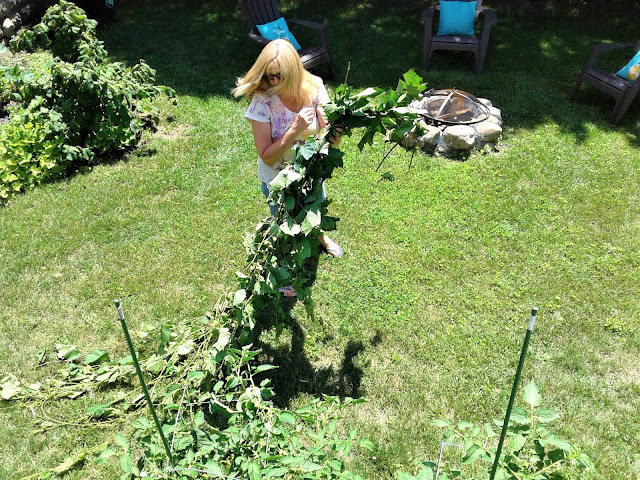
Around here the grapevines grow wild.  I've been making wreaths with them for a while, but it was time to make something new. It needed to hang and it needed to hold plants/flowers.  The idea of a Wall Planter was born! Let's get started. The first thing to do is grab some grapevines. This was just one batch.  I used 3 batches like this one. Here's another shot.  You'll also notice I like them LOOOOONG. The next step is to clip off all of the leaves. I left the 'curlicues' - I'm sure that's the technical term for them - on. Here's the 3rd batch of vines with the leaves stripped: I made an oval and started winding the vines together. I continued to twist and wind the vines and added some through the middle to make the edge of the planter. From that horizontal edge, I added some twisted pieces so I could weave vines through them. They were added in the front and the back.  I curved the front ones out and kept the back ones flat since this planter would