Posts

Showing posts from May, 2021

The New DIY Gal

Image
  As many of you already know, my DIYing has been quite limited lately.  Between Carpal Tunnel Syndrome in my right wrist and arthritis & possible herniated discs in my neck I've been relying on previously completed projects for sharing on the blog.    Rosie decided she was ready to step in and help!  I caught her rummaging through my closet where she found a chambray shirt and decided it now belonged to her. She also found my work apron and was well on her way to creating a new outfit.  On the way out the door, she stopped to look at my jewelry and scarves but I informed her that those items could be a safety issue while DIYing.  She had a few 'choice words' for me, but I wasn't giving in.  As you can see, after our little talk about safety, Rosie immediately grabbed a pair of safety goggles and a dust mask. Should I tell her she doesn't have a head, therefore, no worries about eyes and a respiratory system? Never mind, what am I thinking?  This is Rosie, The D

It's a Picnic Basket

Image
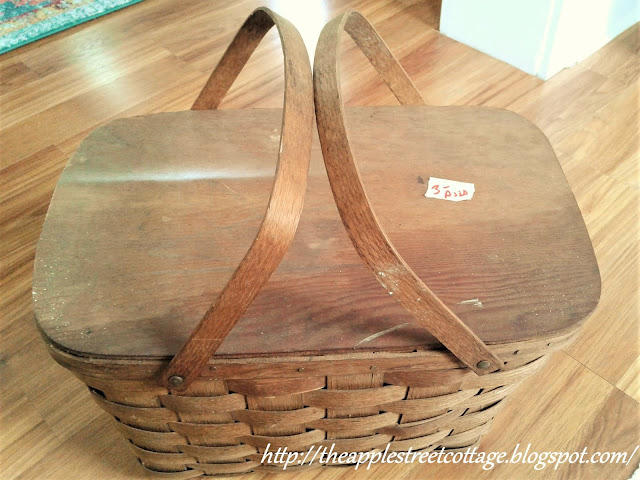
  W elcome back to the 'Do It Over' Designers blog hop.  We are a group of bloggers who love to recycle/upcycle/DIY.  I'm happy to host this blog hop and I hope you'll visit everyone to see what they have to share with you.  Their links will be listed at the end of this post. Let's get the story started... There it sat...at an Estate Sale...in a corner... ...with this label: For that price it HAD to have a giant hole, right?  So I turned it around, over, upside down.....nothing.  OK, maybe a small chip or two, but nothing major.   This was the most noticeable bit of damage. Then I opened it up and there it was... The hinge was ripped out. Let me back out and show you how I think it happened. Footprints!  Who steps on a picnic basket lid?? Clearly, someone did, but knowing that it was an easy fix, I brought it home, cleaned it with Murphy's Oil Soap and got to work.  First, I removed the staples holding the elastic in place on the lid.  It was pretty dirty. The h

Five Favorites for Dad

Image
Today I have a special post for you.  It's a look back at a few of my favorite makeovers/rescues in honor of my Dad.  You see, he was the one who first sparked my love for rescuing old thing and today would be his 100th birthday.  Even though I lost him almost 35 years ago, there isn't a day that goes by without thinking of him, especially when I'm covered in sawdust, wood filler, stain, or all three!  He was the one who first handed me a piece of sandpaper and showed me how to use it.  More than once, while working outside, I've had a dragonfly land nearby.  There are different legends associated with dragonflies and one is that they represent transformation.  That makes sense, since I'm always transforming something when one shows up.  The other theory is that it's a loved one reaching out to you.  If that's the case, I know who it is!  So, this post is for you, Dad.  I think you'll like what you see.... First up is the Free Table .  Since he was a 

Herb Sign

Image
  Spring is in the air!  The tulips are blooming, the grass needs mowing, and it's almost time to get the herbs in the ground.  Welcome back to 10 on the 10th.  A group of bloggers sharing ideas and inspiration for under $10.  This month our theme is 'Gardening & Outdoor Decor' and I've created a simple herb sign that I can't wait to share with you! I dug through my box of wood and found this piece.  If you don't have a box of wood, and I know many of you don't, I saw something similar at the dollar store.  Your other option is your local home improvement store.  They often sell their scraps at a good price.   Some green craft paint was applied... ...and before it dried, a damp rag wiped away some of the paint. I love how the grain of the wood shines through! I used my Cricut Maker to create a stencil with contact paper that I weeded... ...and applied to the surface of the board. It's important to 'burnish' the edges with an old gift card/cre

What Do You Do With a Cigar Box?

Image
You upcycle it, of course!  I'm glad you're here because I want to show you how I decided to use this cigar box that has been sitting around for a while.  If you're a crafter that owns a Cricut machine, this is the post for you.  The Maker is a machine that cuts a wide variety of material using different blades.  There are many blade storage options out there - none of which thrilled me, so I decided to make my own.    Presenting, the Cigar Box: The box was in excellent condition so all I did was wipe it down with a cloth before I got started on the inside.   Since it was all wood, I cut a piece of felt and glued it to the bottom of the box. This provided a soft surface for the blades and housings to rest.  Next, I grabbed some paint stirrers, cut them to size, and painted/sealed them.   I measured the distance for smaller pieces to create compartments.  You can see the chalk marks above.  I cut more paint stirrers and placed them for 'fit'. They were also painted a