Posts

Showing posts from July, 2020

The Chair Table

Image
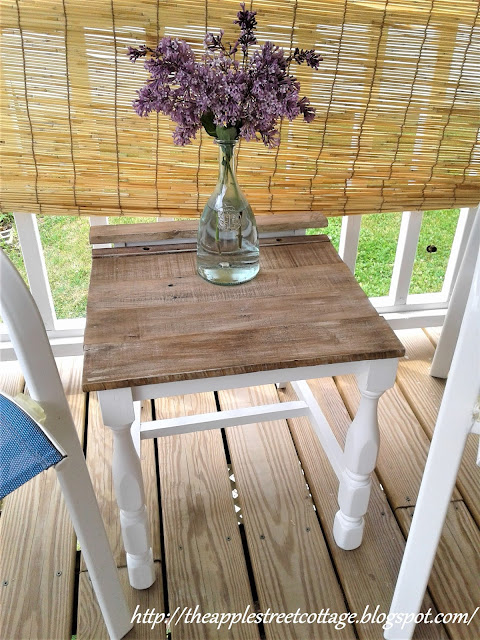
I know, the title is a bit odd, but that's exactly what I'm going to share with you today.  This is a project I've wanted to try for a long time and thought it would be perfect for the debut of the 'Do It Over' Designers , a group of bloggers who love to recycle/upcycle/DIY.  I'm thrilled to be hosting this blog hop and hope you'll visit everyone involved to see what they have to share with you.  Their links will be listed at the end of this post. On to the project.......................... This little table came from very humble beginnings.  It actually was a chair that was given to me and since it was free, it was perfect for trying this upcycle. This is how it looked when it arrived: The first thing I did was remove the seat and cut off the back.  Don't worry, I have plans for that too, but that's a post for another day.   Update:   Take a look at the Chair Back Shelf . I gave it a good cleaning with Murphy's Oil Soap, let it dry, an

The Hedgehog Chair

Image
You could say that this is the companion piece to the Hedgehog Bench. It certainly didn't start out this cute, as a matter of fact, it was a bit of a mess.  I'm pretty sure it was an old school chair that was covered in layers of chipping and worn paint. At first, I thought I could just sand it and smooth the edges of the paint.  I did that, but when I started to paint, every edge showed through and it looked terrible.  Out came the Citristrip.   It took a couple of coats to remove the multiple layers of paint, but I was pretty pleased with the result. A few stray bits of paint were left behind, but nothing that couldn't easily be sanded smooth.  Once that was done, this little chair was given a coat of primer and 2 coats of light gray porch paint.  That's right - porch paint.  I used it on the As you can see, it was looking a little plain, so I grabbed the rest of that hedgehog fabric, some batting, and a button, and got started on a cushion.  A short

Easy Summer Centerpiece

Image
Welcome back to  10 on the 10th.  A monthly blog hop where a group of bloggers share ideas for $10 or less.  This month's theme is Summer Party  and we have some great ideas for you.  Now, I realize parties are at a minimum right now due to Covid-19, but a Household Party or Party for 2 is always a good idea! It's summer and we are spending a lot of time outdoors enjoying our yard and covered porch.  I decided the table needed a centerpiece so I made 2 stops:  a local nursery and the dollar store.   At the nursery  I bought 2 pots of petunias, and the dollar store produced a planter and a pink flamingo. The two pots of petunias were planted after adding some plastic as a liner.   A little 'kitsch' was needed since it's summer and there's a pandemic, and..................well, you know.  So I added a flamingo! He makes me smile! If flamingos aren't your thing, you can always take it out and just enjoy the flowers. I may not be having a

Outdoor Lantern and a Household Tip

Image
I found this little lantern at an Estate Sale recently.  It was the last day of the sale and I was surprised it was still sitting there.  It had all of its parts and none were broken. The only 'problem' I could see was someone had left a lit candle in the cup and it melted over the sides.  The wax was stuck.   I picked it up and was surprised at it's weight.  For such a little lantern it was really heavy! (It weighed-in at 5 &1/2 pounds and it's only 11 inches tall.) I asked, "How much?" The man said, "Two bucks." I said, "Sold!  Add it to my pile!" When I got it home, I put it in the freezer.  That's right, the freezer.  It's the easiest way to get wax out of or off something.   You may be wondering how long it was in the freezer.  Well, to be honest, I forgot about it, so it was in there a few hours.  When it came out, I grabbed the edge of the candle wax and out it popped! Easy Peasy! I really love the drago