Posts

Showing posts with the label Bathroom

Bathroom Refresh

Image
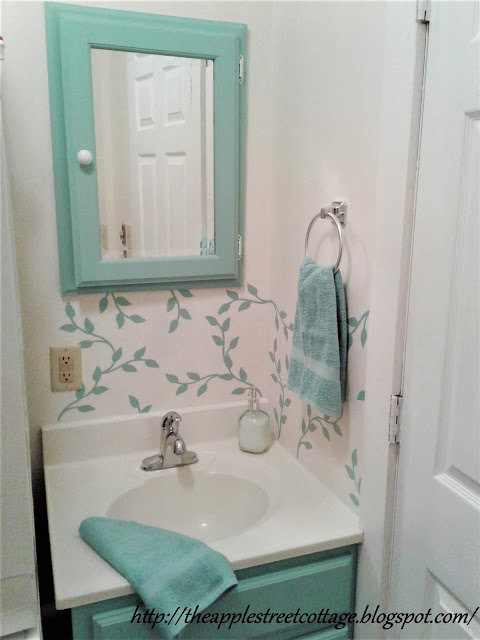
Say hello to the updated powder room.  It's a  challenging space and my goal was to brighten it up on a budget.  The room is approximately 5' x 7'(and I'm rounding up), has no windows, and contains the washer and dryer.    The entire project cost me about $35.  Are you ready to see how I did it?   Let's get started... Behold the 1980's oak: Here's a separate shot of the vanity.  It was tough to get the whole area in one photo since the room is so small. I decided not to paint the walls since the dryer is stacked on top of the washer.  See them right next to the vanity? In order to get them out for painting, I'd have to take the door to the room off it's hinges and move it.  I wanted this to be an easy makeover, so I opted to paint the medicine cabinet and the vanity.   Off came the hinges, knobs, shelf pegs, and pulls.  The pulls were being replaced, but everything else was spray painted.   ...

Linen Closet Update

Image
I was so happy to find a nice, large linen closet in the new house, but I wasn't happy to find that the shelves were made of rough plywood.  The simple solution? Peel & Stick floor tiles.  Off I went to the local builders supply store for a box of tiles that cost about $20. Here's what the closet looked like before starting this project...keep in mind these are photos taken inside a closet! After wiping them down, I started laying the tile in front, mostly because I didn't want any 'piecing' to show and, seriously, who looks in the back of your closets/cabinets?? Then it was time to measure and cut a piece to fit in the back: In the interest of full-disclosure, I have to tell you that my husband did most of the measuring and cutting.  He's faster than I am and we were still moving in! As you can see, on the right, we only needed part of a tile, so we measured the width and cut the tiles with a utility knife. Notice there's cardboa...

$2 Cabinet Makeover

Image
The past two weeks have been a whirlwind.  We are all moved in, most of the boxes have been unpacked, and I've even had time to start a couple of projects.  If you follow me on Instagram, you've seen a couple of outside projects but, one of the first inside projects I tackled was giving our bathroom medicine cabinet a makeover.   It wasn't a bad medicine cabinet, just a little 'blah'. It also wasn't real wood, so I knew that any moisture from jars, etc. would take a toll on the surfaces.   To create this transformation, I went to the Dollar Store and bought two rolls of contact paper.  The first step was to remove the shelves and measure from the top of the cabinet all the way to the bottom shelf edge.  I wanted one, continuous piece.   I'm sure you know the rule...measure twice, cut once?  Well, that never seems to work for me.  It ends up being 'measure twice, cut once, SWEAR, and try to fix it'!  I'm talented ...

The Cottage Is Sold!

Image
You may remember, several weeks ago, I mentioned some 'Big News".  Well, here it is...we sold the Cottage.  We didn't plan it, it just happened, really!  Are you ready for the story? Last July I was sitting in the front yard weeding the flower beds, when a car drove by a few times and finally stopped.  The woman asked me if I knew anything about the house next door.  It had a FSBO sign with no contact information.  I told her the only thing I knew was that it was a 3-bedroom house and the owners were rarely home. We continued to chat about houses, etc. when I told her that my husband always says for the right price, you can have ours!  She thought I was kidding and I informed her that I wasn't.  My husband heard us talking and came out on the porch to join in the conversation. We chatted for a while and just 'hit it off'. Finally, we asked if she'd like to see the house.  She said she would. After being in the house for about five minut...