Posts

Showing posts from July, 2019

Small Curio Cabinet

Image
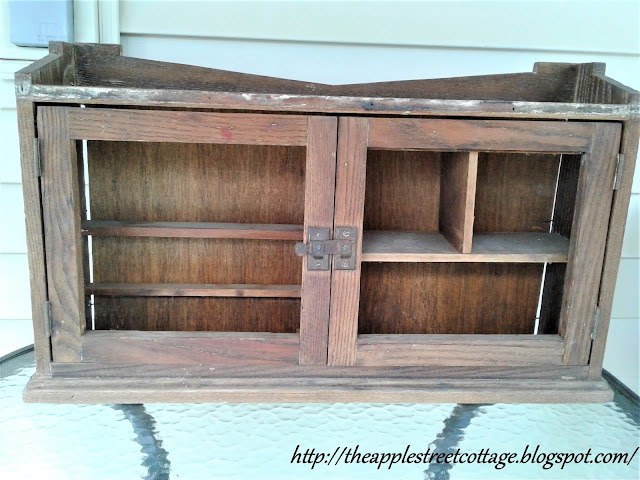
I recently found this small curio cabinet at a garage sale.  It was in pretty rough shape, about 28" wide and 17" high, but it was only $5.  Of course,  I bought it! The wood has a deep grain and splinters easily.  I'm guessing it's made of ash, since it has some weight for its size. The hardware also was not in great shape and since the wood was so dry,  I was hesitant to remove it.  I tried polishing it and the hinges shined-up nicely, but the latch did not.  I decided to spray paint it with antique gold paint instead.   After cleaning, filling, repairing, and sanding the entire cabinet, it got two coats of black chalk paint.  Since the wood grain was shining through, I decided to distress the edges and embrace the rustic look.  Two coats of polycrylic sealed the paint and then it was time to work on the back.   A 'pop' of color was in order for this little gem, so I decided to decoupage some colorful napkins on the back.  Before I got starte

Dill Dip

Image
Since I recently walked you around the gardens at the Cottage and you saw how well my dill was growing, it's time to share a recipe for that dill.  There's nothing like using ingredients from your garden! Here's what you need: 1/2 cup mayonnaise 1/2 cup sour cream 2 tsp. minced onion 2 tsp. dried dill Please ignore the jar with the dill in it.  I need to paint the lid and label the jar...it's on my  'To-Do List', but since it's summer, and it's nice out, I'm doing more outside things....if you know what I mean?? Back to the recipe......Combine the mayonnaise and sour cream in a small bowl. Add the minced onion: Combine and add the dill: Mix well. Refrigerate for a few hours to allow the flavors to 'mingle'. Serve with your favorite veggies and crackers! That's it!  This easy recipe is great for an afternoon snack or a summer gathering.   If you're wondering how I dry my dill, I just pick it a

The Ants Go Marching...

Image
Or, at least one ant!   Welcome back to Ten on the 10th where a group of bloggers get together and share their ideas for under $10. Our theme this month is the Picnic/ BBQ and I'd like to thank Terrie from Decorate and More With Tip for hosting. When I heard this was the theme, the first thing I thought of were ants at a picnic and knew I had to do something with that idea.   So I gathered up three golf balls and got to work.   The first task was to drill holes in the golf balls so the wooden skewer would go through them.  My hubby had a pipe clamp to hold the golf balls and started drilling. The middle golf ball was drilled all the way through.   The others just enough for the skewer to fit. The hole you're looking at will be on the bottom for the legs to be attached. Two smaller holes were drilled in the 'head' for the antennae.  Naturally, I made 2 dots and then changed my mind.  That's why you see the holes above them! After a coupl

Dressing Table Bench Makeover - Plan C

Image
You know the story behind the best laid plans, right?  Well, this little bench fits it to a 'T'!   I found it in a little shop for $8 and since I needed a bench for my Dressing Table Makeover , it came home with me.    The legs didn't really match, but it was the right size and would do until I found the one I really wanted.   The seat was hot-glued on, so that popped right off, and s ince it had a ton of chippy paint I got out the Citristrip and started coating it.  I covered it in plastic wrap and left it overnight.   This is what it looked like in the morning when the plastic wrap came off: After some scraping and scrubbing, this is what I found: There looked like a possibility of decent wood to be refinished, so I gave it another coat of stripper: I did some sanding, and (I thought) it was ready to be finished. My Mistake! I grabbed the Tung Oil and started applying it to one of the legs.  Sadly, things immediately went south.  The oil