Posts

Showing posts from May, 2019

Welcome to the Pig Pen!

Image
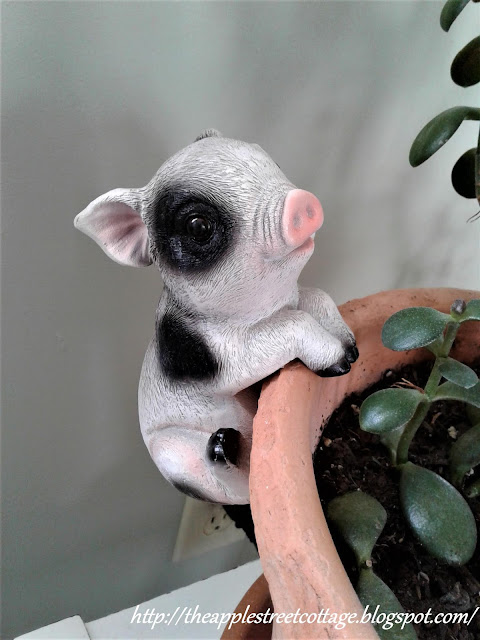
A few weeks ago, my friend, Kim at Exquisitely Unremarkable  had  this adorable pig pot hanger as a giveaway.  Since I have been collecting pigs for more than thirty years, I entered ..........and won! Thanks, Kim! Isn't he adorable?   I took this as a sign that it's time to share my pig collection.  Are you ready? It all started with this guy: My husband had this bacon press when I met him and I fell in love with it (along with my future husband, of course!)  I started collecting and the larger ones all landed on top of my kitchen cabinets. Welcome to the Pig Pen!  That's the name this area has been affectionately given.  Let's meet the occupants....... Starting on the left is 'Watering Can Pig'.  He was a gift from my kids when they were little and really is a watering can, not that I've ever used him.  I love the hammered metal. Next is 'Farmer Pig' who I found sitting on a shelf in a discount store. I had to take him home, the

Garden Lights DIY

Image
Spring has arrived and the garden is calling.  We've had so much rain that it's been really difficult to get anything done, so we work between the raindrops.  If you remember from last year,  this house had absolutely no gardens.  Everything was overrun with weeds and as we dug, we found old steps, pavers, and coal.  Needless to say, I was anxious to get started this year.   We have very large - 30 feet - arborvitaes that give us privacy at the back of our property.  I've always thought they'd look pretty with lights in them, so, naturally, I came up with a plan.   I had some  Wine Cup Upcycles  a few months ago and now I've got a new one! So far, I've made two of them and they look so pretty at night! Here's how I made them..... You only need a few supplies: Jute twine, a pair of scissors, solar light top (mine was a broken one), and a wine cup.  If you don't have a wine cup, any small jar should work.   Start by cutting 4 pieces of jute,

It's Time for Gifts - Ten on the 10th

Image
Welcome back to Ten on the 10th where a group of bloggers get together and share their ideas for under $10. Our theme this month is Gift Giving and I'd like to thank Katie from Let's Add Sprinkles  for hosting this month. If you just came from Tammy at Patina and Paint , let's get started.... It's that time of year for gift-giving for mothers, teachers, and graduates and I've got an idea that can be customized for any of the three.   This particular box would work for Mother's Day or for a teacher.  It started out as pallet wood and I cut the pieces to size.  Sorry, no sawing pics.  I like my fingers too much! I made the box 12" long and everything was sanded.   Of course I forgot to take the assembly pictures, but here's a peak at one of the nails going in: Here's another shot of the bottom of the box: It was time to decoupage and I use the same procedure every time.  You can reference it HERE .  Remember to always separa

This & That - Spring Edition

Image
I really thought I'd have more projects completed around here, since it's Spring and all....sadly, Spring is not really making an appearance.  For the most part, we've had cold, damp days complete with raindrops and even a few snowflakes.  I'm over it! So, here's a peek at what has been happening at the Cottage.  I bought some tulips, simply because I needed a touch of Spring: The colors sold me! On the way to the store to get supplies for a project, this happened: I just love seeing them around town! This project involved the jigsaw and sander: If I could just get paint to dry! There was some paint that needed removing on this one: Have you tried the plastic wrap trick? No project is complete until you remove all the old nails: Removing old caulk is always fun: Especially when it pulls off part of the paper on the wallboard! By far, this is my favorite: Can you see the raindrops dripping down the stones? I get no credit for