Posts

Showing posts from May, 2018

I'll Be Back...

Image
We are in the process of moving to the new Cottage.  Come back again soon to hear all about the new adventure!

A New Cottage!

Image
Yes, it's finally happening!  After a long search, we have found another house and will be closing soon.  If you've been following you know the funny story that goes along with the selling of the Cottage.  If you missed it, click HERE for the details. I'm not really sure that the new house qualifies as a 'cottage' since it was built in 1890 and has two stories, but as soon as we walked into it, we knew it was the right house for us.  The people we are buying it from did all the hard work - believe me, our shoulders are thanking them - so all that is left is the gardens and decorating.  (Insert 'Happy Dance' here) Would you like a peek? I love the staircase! This is the nook off the dining room. Kitchen Pic #1 Kitchen Pic #2 There are lots of things to do before I ever get to the kitchen, but I need a little help.  You see, I've always wanted white kitchen cabinets (just take a look at my Kitchen Board on Pinterest) but these are

Cupcake Potholder Tutorial

Image
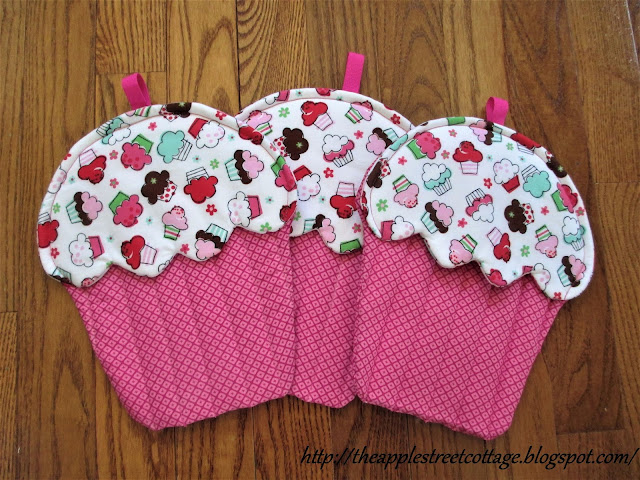
If you're like me, potholders take a beating in the kitchen.  They end up stained, burned, and looking pretty humble after a while.  That's the state mine were in, so I bought some fabric and got busy.  WARNING:  This post has LOTS of pictures! The patterns have been in my stash for a while, but in addition, here are the things you'll need:  contrasting fabric, matching thread, cotton batting, Insul-Bright, pencil, chalk, scissors, sewing machine, ribbon (optional). Start by placing your patterns on the wrong side of the fabric and trace with a pencil. You will now layer the pieces in this order:  one piece of batting, one piece of Insulbrite, and the two pieces of fabric with right sides together. At this point, you are going to cut an opening in the top piece of fabric only.  This will be for 'turning' after you sew the pieces together.   Do this for the cupcake base and the top.  Next, pin your layers together and sew along the pencil l