Posts

Showing posts from January, 2020

Valentine's Day Coasters

Image
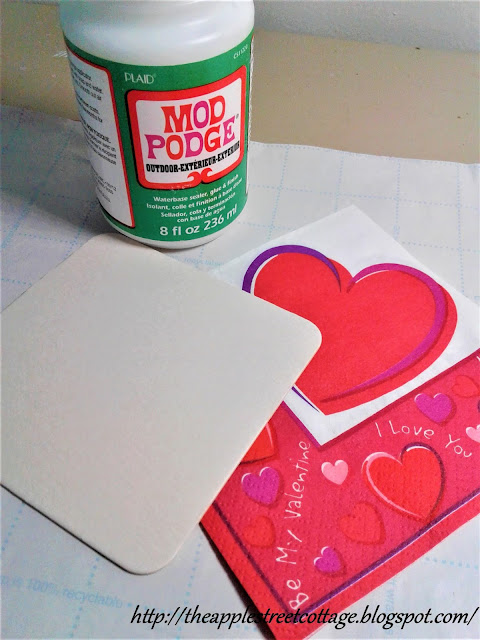
Valentine's Day will be here before you know it and even though I don't do a lot of decorating for the holiday, this year I thought I'd make some coasters. Why, you ask?  Mostly because I found some old Valentine's Day-themed napkins in the back of the cabinet and thought, why not?   Let's get started... These are the main ingredients.  Be sure to peel the layers of your napkins apart so you have only one layer.  The cardboard coasters were in my stash of goodies, and the Mod Podge is the Outdoor formula.   Begin by brushing a layer of Mod Podge on the cardboard coaster. Be warned.  This formula is very thick! After coating the coaster, lay your napkin on it and gently smooth it down.   Because paper napkins are so thin, I use plastic wrap to smooth out the wrinkles, lumps, and bumps.   Trim the napkin around the coaster, leaving about a quarter inch of napkin all the way around. Apply some more Mod Podge around the back edge of the coaster an

Spoon Rack to Herb Rack

Image
If you grow your own herbs, you know the need for a place to dry them.  Last summer, mine were draped over every surface I could find, so when I found a spoon rack at a little shop last fall, I knew exactly what to do with it.   Let me begin by saying it wasn't nearly as nice as this.  When I found it, it was outside in a pile of junk, exposed to all the elements.  I started to clean it but stopped myself for a picture. Pretty gross, huh?  I used Murphy's Oil Soap and a blue scrub pad to get the layers of dirt off of it. I left it in the sun to dry and it was looking better already! Next came a little sanding and filling.  The cracks and gaps were filled with wood putty but those cut-outs for the spoons were pretty rough. I do have a Dremel with some of those handy little sanding attachments, but I was working outside and that meant I'd have to go to the basement to get it.  So I went 'old-school' with some sandpaper wrapped around a pencil. I ev

Organizing Your Essential Oils

Image
Have you been bitten by the essential oils bug?  I wasn't exactly bitten, but my daughter uses them and gifted my husband and me a set of oils and a diffuser, which we both love.  The problem was keeping those little bottles of oils organized.  The oils are kept in a cabinet and every time I went looking for a new oil to diffuse, I ended up pushing them around, knocking some over, until it looked something like this: Since I like to keep things tidy, I needed a way to keep my oils organized.  While walking through the dollar store one day, I spied this little organizer and had an epiphany! It was the perfect size for those little bottles and each row was 'stepped'.   As soon as I got home, I peeled off the plastic and put the oils into the organizer.  I purposely place the 0.5 oz. bottle of Tea Tree oil in front so you could see that the larger bottles fit just as well as the .17 oz. bottles. Here's a view from another angle: The organizer fits per

Hello 2020

Image
I debated for a long time on the first post of the new year.  There were so many ways to go... A look back at favorite posts from 2019?  No, I firmly believe in looking forward. A New Year's Resolution?  Certainly not my style and I never keep them anyway. A 'word' for 2020?  That falls under the resolution category. Then I started thinking about this blog - its style, its purpose, what is actually is, and isn't.  Now I was getting somewhere!  I started this blog over five years ago to share the journey of just retiring and buying a new cottage.  I promised to share it all...the good, the bad, and the ugly and I think I've fulfilled that promise with the porch repairs , the filthy fence , selling the old and buying a new cottage , and many diy and crafty projects - too many to list.  In the midst of all of it, I shared my own personal style.  What is that style you ask?  It's many things, but let's start with what it isn't.  It is not trendy ,