Posts

Showing posts from October, 2021

Rosie, The Boho Witch

Image
Welcome back!  It just wouldn't be Halloween without seeing Rosie dressed in her costume.   As you know, Rosie is a feisty gal and has definite ideas regarding her couture, so when I was visiting some blogs and heard, "Stop!  That's it!' I knew Rosie had found her outfit for this year. The inspiration for Rosie's Halloween costume came from Marie @ Interior Frugalista and her Boho Witch Scrap Wood 3D Halloween Sign .  Since it impressed Rosie you must go see it because, well, not much impresses Rosie !  lol Since Rosie is a real dress form (just ask her) I started with a black skirt and top. I bought a few rolls of Halloween ribbon at the dollar store, cut them to size, and started tucking them into her waistband. I continued until the skirt was covered. One more piece was wrapped around her for a waistband. Since jewelry completes the outfit. Rosie was given a pearl necklace complete with a spider pendant. There may also be a few stray sparkles! After wrapping a p

The 'Sweater-Look' Pumpkin

Image
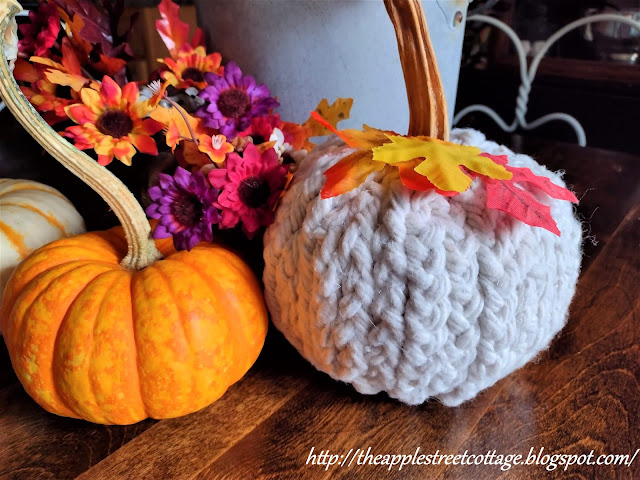
  If you're like me, I'm sure you've seen the pumpkins created from old sweaters or braided yarn.  They're beautiful and I really wanted to make one.  The problem? I don't have an old sweater that I want to cut up and as much as I threaten to relearn to knit/crochet, I haven't done that yet. Therefore, I have no yarn.  So, what's a gal to do?  Head to the dollar store for a mop!   Yes, it's made from a dollar store mop.  I'm sure you remember the other one I bought to make the Five Little Ghosties Garland. No golf balls needed this time! Before starting this project, let me welcome you to the Creative Craft Hop hosted by Sara from Birdz of a Feather .   If you're visiting from Terrie - Decorate & More With Tip , welcome to the Cottage.  At the bottom of this post I'll direct you to the next stop on this hop, but be sure to visit all of the other stops too for some amazing inspiration. They will all be listed. Now let's get started. 

Five Little Ghosties!

Image
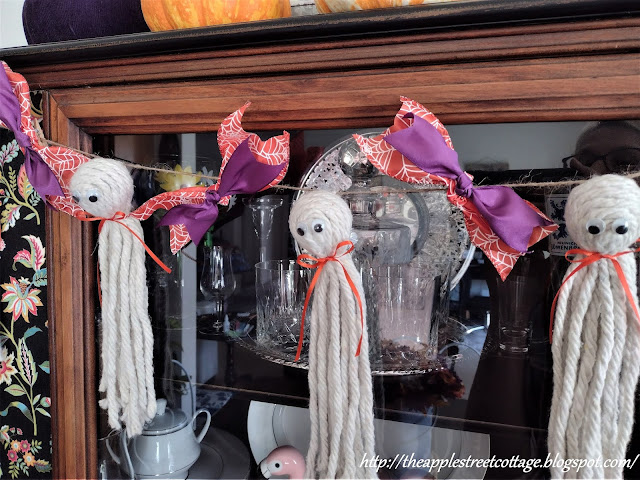
Do you remember that rhyme?  No, I'm not sharing a rhyme today, but I am sharing five little ghosts. They're easy, inexpensive to make, and can be turned into a cute garland for Halloween.  Have a peek: Can you   guess what I used to make them?  Have a look: Take a trip to the dollar store and get out your glue gun because it's time to get started. The first step is removing the mop strands that are held in place by a piece of plastic. I used my paint can opener, and it popped right open. Spread a little glue on the plastic golf ball.  Add your mop strands. Continue gluing them around the ball. Start filling in the areas on the sides... ...until the entire ball is covered. Take a piece of cotton twine and tie it under the ball. Add two wiggly eyes and tie a ribbon around the neck.  Sorry, I forgot to take a picture of the ribbon, but, I know you can figure it out! Then hot glue a piece of twine on the back of the head for tying each ghost to the garland. In order to give th

Embroidery Hoop Halloween Wreath

Image
Today I'd like to show you how I made this 'wreath' from an old embroidery hoop.   I'm calling it a wreath after reading this definition: Wreath:  something intertwined or arranged in a circular shape. I chose one of several hoops that I found at a yard sale. Clearly, I have a few! After taking the hoop apart, both pieces were painted with black craft paint. After they dried, I cut a piece of spider web fabric slightly larger than the hoops.  Glue was applied to the outside of the smaller hoop and the inside of the larger one.  The fabric was draped over the smaller hoop and the larger one was added and tightened with the small screw. The excess on the back, was trimmed with scissors. It was time to decorate!  First, pompom fringe was added with hot glue. Next on the list?  A Bow! I started with a piece of 6" wide black, sparkly tulle that was 20" long.  It was folded in half with a little overlap. I pinched it in the middle to make the start of the bow.  Afte