Wine Bottle Lantern
This post may contain affiliate links.
Are you ready for another upcycle project for your outdoor space? I hope so, because I'm back with one more that I just love! I've been having much more success with bottle cutting now that I've figured out a new technique.
Welcome to the 'Do It Over' Designers blog hop. We are a group of bloggers who love to recycle/upcycle/DIY. This time we are sharing all things 'glass'. I'm happy to host this hop and I hope you'll visit everyone to see what they have to share with you. Their links will be listed at the end of this post.
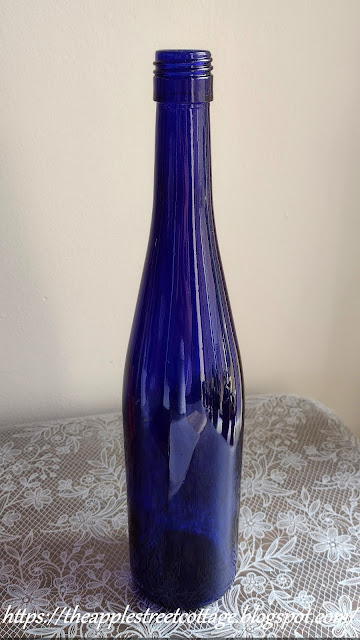
This project begins with a bottle:
Before we get started, my PSA:
Put on safety goggles. You're working with glass and you only get one set of eyes! I've never had a bottle shatter/spray glass while doing this, but better safe than sorry!
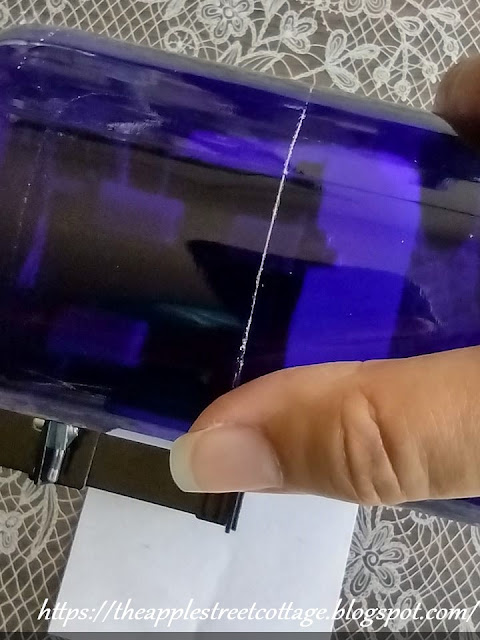
The first step to bottle cutting is etching a line where you want the bottle to break or separate. After adjusting the cutter (it's very easy) for where you want the cut, it's a simple as rotating the bottle on the cutting wheel. This is the bottle cutter I use.
This is MY technique: After etching your bottle, put it in the refrigerator for 15-20 minutes. When it's nice and cold, take it out and start rotating the etched line over a candle flame.
Do this for a few minutes and then place the bottle in a bowl of ice water. You will need to repeat these last two steps a few times before the bottle will separate. One way to tell if the process is working is to listen. While rotating it over the flame, you will hear little 'tink' noises. I'm sure that's not a real technical term, but that's what it sounds like to me!
Ta-Da! The bottle separates!
I used to use the process of alternating between almost boiling water and ice water. It never worked well for me often resulting is this:
There's one other thing that can happen. This bottle separated well, but also left some cracks:
This one went in the trash. I wouldn't trust it with heat from a candle.
Now that you have a bottle in two pieces with a nice clean edge, it's time to sand it since it is very sharp. You can use polishing powder, but I just used the sandpaper that came with the cutter. I also wet the sandpaper.
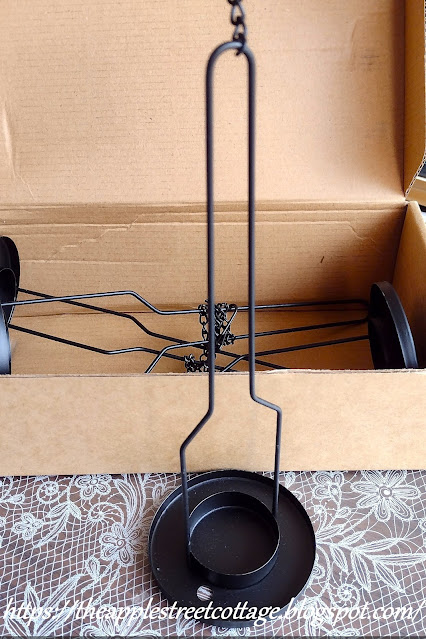
I ordered the hanging candle candelabras for wine bottles and they were just what I wanted!
My wine bottle fit perfectly!
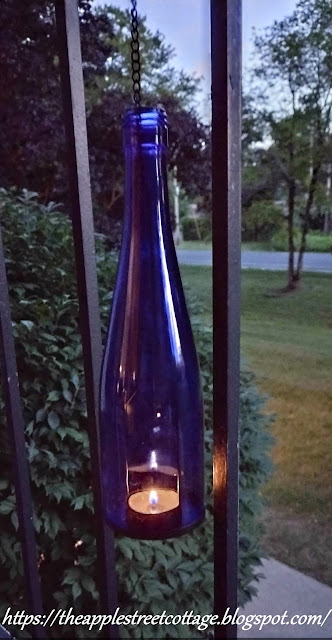
Later on, I added a tealight and put it outside.
Then it got darker:
Perfect!To keep away those pesky mosquitos, use citronella tea lights!
Then I got to thinking...maybe it needed to be 'dressed-up. I got out some wire and a faux pearl.
Which is your favorite?I'm off to cut more bottles since that one lantern is looking a bit lonely. Although I did make a Wine Bottle Torch, so there's a little variety on the balcony! That project also resulted in a bonus piece when all was said and done. I hope you'll take a peek!
Have you tried bottle cutting yet?
Before you run off, don't forget this is a blog hop and the rest of the team has some amazing upcycle/recycle/did-it-over projects to share with you. The links are all listed below:






So pretty - clever idea!
ReplyDeleteThanks, Patti!
DeleteBeautiful Ann! That's some process, I give you a lot of credit. I'm not sure I could cut glass, and get such a perfect edge, but your pretty craft makes me want to try!!
ReplyDeleteThanks, Kim. You should try it. It's easier than it looks!
DeleteWhat a fun and unique way to upcycle bottles, Ann. Seems like what you can create with them is virtually unlimited. Not so sure about cutting the bottles, though. I'm a bit accident prone, but they certainly are pretty to look at once completed!
ReplyDeleteIt really is a lot of fun, Gail. The bottle cutter does all the hard work - give it a try!
DeleteWhat a fabulous project Ann. I love how the light comes through that blue bottle. I had a glass cutting kit waaaaaay back in the day. Must have been the 70s I think (I'm dating myself here, lol) and I did make a few things but I honestly don't remember how they turned out. I think I might have to try this again. I would love to try clear bottles decorated with paint pens.
ReplyDeleteClear bottles would be so pretty. I was thinking about etching creme...
DeleteSo cool! I'm always interested in how people cut glass, I've seen several different methods but have yet to try myself. I love how yours turned out!
ReplyDeleteThis is right up your alley, Tania. It's easier than it looks!
DeleteGreat recycle! Over from Pink Saturday. Enjoy your week!
ReplyDeleteThank you, Nancy. You too!
DeleteA beautiful result Ann, I love the blue bottle. I have a project like this on my list but never get around to doing it. I think i have had my bottle cutter 2 years. lol
ReplyDeleteThank you, Anita. You should get out your bottle cutter - it's easier than it looks!
DeleteI love the look of your DIY lantern and how you embellished it! Makes me wish that I liked wine so I can get some pretty blue bottles lol.
ReplyDeleteYou need to find a friend who's a wine drinker and buy her a bottle or check with a local restaurant...you don't know until you ask....
DeleteThis is a brilliant idea! I had no idea you could cleanly/carefully break glass by alternating it with exposure to cold and heat from a candle. I love the final result. Thank you for sharing this post with the Home Imagined Link Party.
ReplyDelete
DeleteThank you! The glass actually expands and shrinks from the heat and cold. The etched line is it's weak point.
WOW that's absolutely gorgeous! Such a crafty idea too. I'm not sure how I would fare breaking the glass but the end result is certainly worth it!
ReplyDeleteHugs
Suzy x
Thank you, Suzy - it's easier than it looks!
DeleteWhat a fun idea! And thanks for sharing your tips for how to get a good, clean break in the glass. I'm glad you stopped by the Home Imagined Link Party!
ReplyDeleteThank you - happy to share!
DeleteI love this Ann! I actually like it both ways, can't wait to see what you come up with next. You always come up with awesome ideas.
ReplyDeleteThank you. That's so sweet of you to say!
DeleteThose are both beautiful!
ReplyDeleteThank you, Joanne!
DeleteThe wine-bottle lantern turned out so pretty! (love that gorgeous cobalt blue color) I think the faux pearl and wire wrapping added just the right touch of glam.
ReplyDeleteThank you for sharing this post in the Talent-Sharing Tuesdays Link-Up 69.
Carol
www.scribblingboomer.com
Thank you, Carol. I can't decide which one is my favorite!
DeleteAnn,
ReplyDeleteGreat way to recycle bottles!! Thanks so much for stopping by!! And thanks for your well wishes for my son and DIL and the twins...
Hugs,
Deb
Thank you, Debbie. I'm so happy for all of you!
Delete