Quick & Easy Halloween Votive Holders
If you're looking for a quick and easy way to add some Halloween decor to your space, I've got you covered. These votive candle holders were completed in an afternoon and I think you're going to love them!
Here's what you'll need:
The list: Mod Podge, foam brush, scissors, glass jars (I used yogurt jars), and some black spider/lace fabric. If you don't have that exact fabric, you can use spider web mesh, Halloween gauze cloth, or spider web deco mesh. After you're done with the basics, I added some spider embellishments - all from the dollar store.
Be sure remove any sticky residue from your jars. I always use this non-toxic method and then wash them well. When dry, cut your fabric a little larger than your jar and paint some Mod Podge on the fabric.
Then paint more Mod Podge on the jar.
Wrap the fabric (Mod Podge side down) around the jar...
...and add a little more Mod Podge on top of the fabric. Leave it to dry.
Once it's dry (or almost dry) tap some more Mod Podge around the rim of the jar.
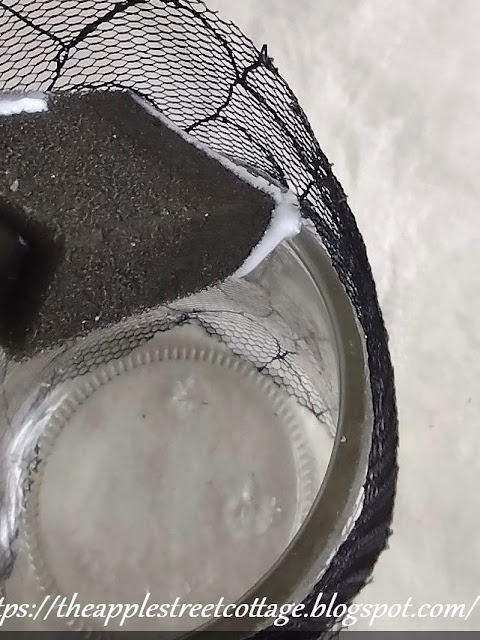
Gently fold the lace fabric over the rim and in to the jar.
I turned mine upside down on some waxed paper to dry and when it was (mostly) dry, trimmed the excess fabric with scissors.
I used the same method for the bottom.
Note: You WILL have sticky fingers!
Two jars done and it's time to embellish!
I started by gluing some grosgrain ribbon around the top. My glue gun gives me a nice thin line of hot glue.
I added a bow and a sparkly spider and called this one complete.
The second one also got the ribbon around the top along with a small spooky spider pick and some black leaves.
My Halloween Votive Holders were done and all I needed to do was add the lights.
Lights on!
I told you it was quick and easy!
A quick word about the tray and candle lantern...we were at an estate sale last weekend and found some fabulous things - including those pictured above. Stop back next time to see more and hear the stories...Yes, there's always a story - or two!
Featured at:


They are just beautiful, Ann! That sparkly spider is perfect for the season. How fun!!
ReplyDeleteThank you, Kim...just a quick and easy project to get into the spirit of Halloween!
DeleteVery nice, I love this idea! I made some little Oui jar jack-o-lanterns a few years ago. Did you know they make lids you can buy for those little jars?
ReplyDeleteThanks, Tania. There are so many ways these little jars can be reinvented. I have seen the lids - plastic and bamboo!
DeleteI love these spooky Halloween candle jars Ann! So cute, and your spider is one I would definitely scream if I come across it in my home! Great idea!
ReplyDeleteThat spider is pretty big, isn't he?? Maybe just some black lace and bling for you!
DeleteThese are so spooky cute, Ann! Join us over at the Creative Crafts Linky Party every Wednesday through Sunday
ReplyDeletehttps://creativelybeth.com/creative-crafts-linky-party/
Followed and Pinned!
Creatively, Beth
Thank you, Beth...I will be there!
DeleteCute and easy project and perfect for Halloween!
ReplyDeleteThanks, Patti...Gotta love those little jars!
DeleteThese turned out so nice thanks for sharing with Creatively Crafty Link Party
ReplyDeleteThank you, Janet. Happy to share!
DeleteIt’s always nice to repurpose something isn’t it?
ReplyDeleteThank you for sharing your post at the Sunday sunshine Bloc this week.
Laurie
Absolutely, Laurie!
DeleteSuper cute and spooky! These lovely little votives will be a feature over at Handmade Monday this week :-)
ReplyDeleteThank you so much, Julie!
DeleteAnn,
ReplyDeleteThese are so adorable. Congratulations, you are being featured on TFT. I hope you stop by. https://www.eclecticredbarn.com/2023/10/halloween-decor-ideas-on-thursday.html
Hugs,
Bev
Thank you so much, Bev. I'll be sure to stop by!
DeleteThe perfect combination of elegant and creepy! Featuring when my link party opens.
ReplyDeleteThank you so much, Carol!
Delete