Summer Ice Cream Cone - From a Witch Hat!
I'm back with one last project created from a Dollar Tree witch hat frame. You may remember the original Witch's Hat and the Spring Carrot, but now it's Summer and that means Ice Cream!
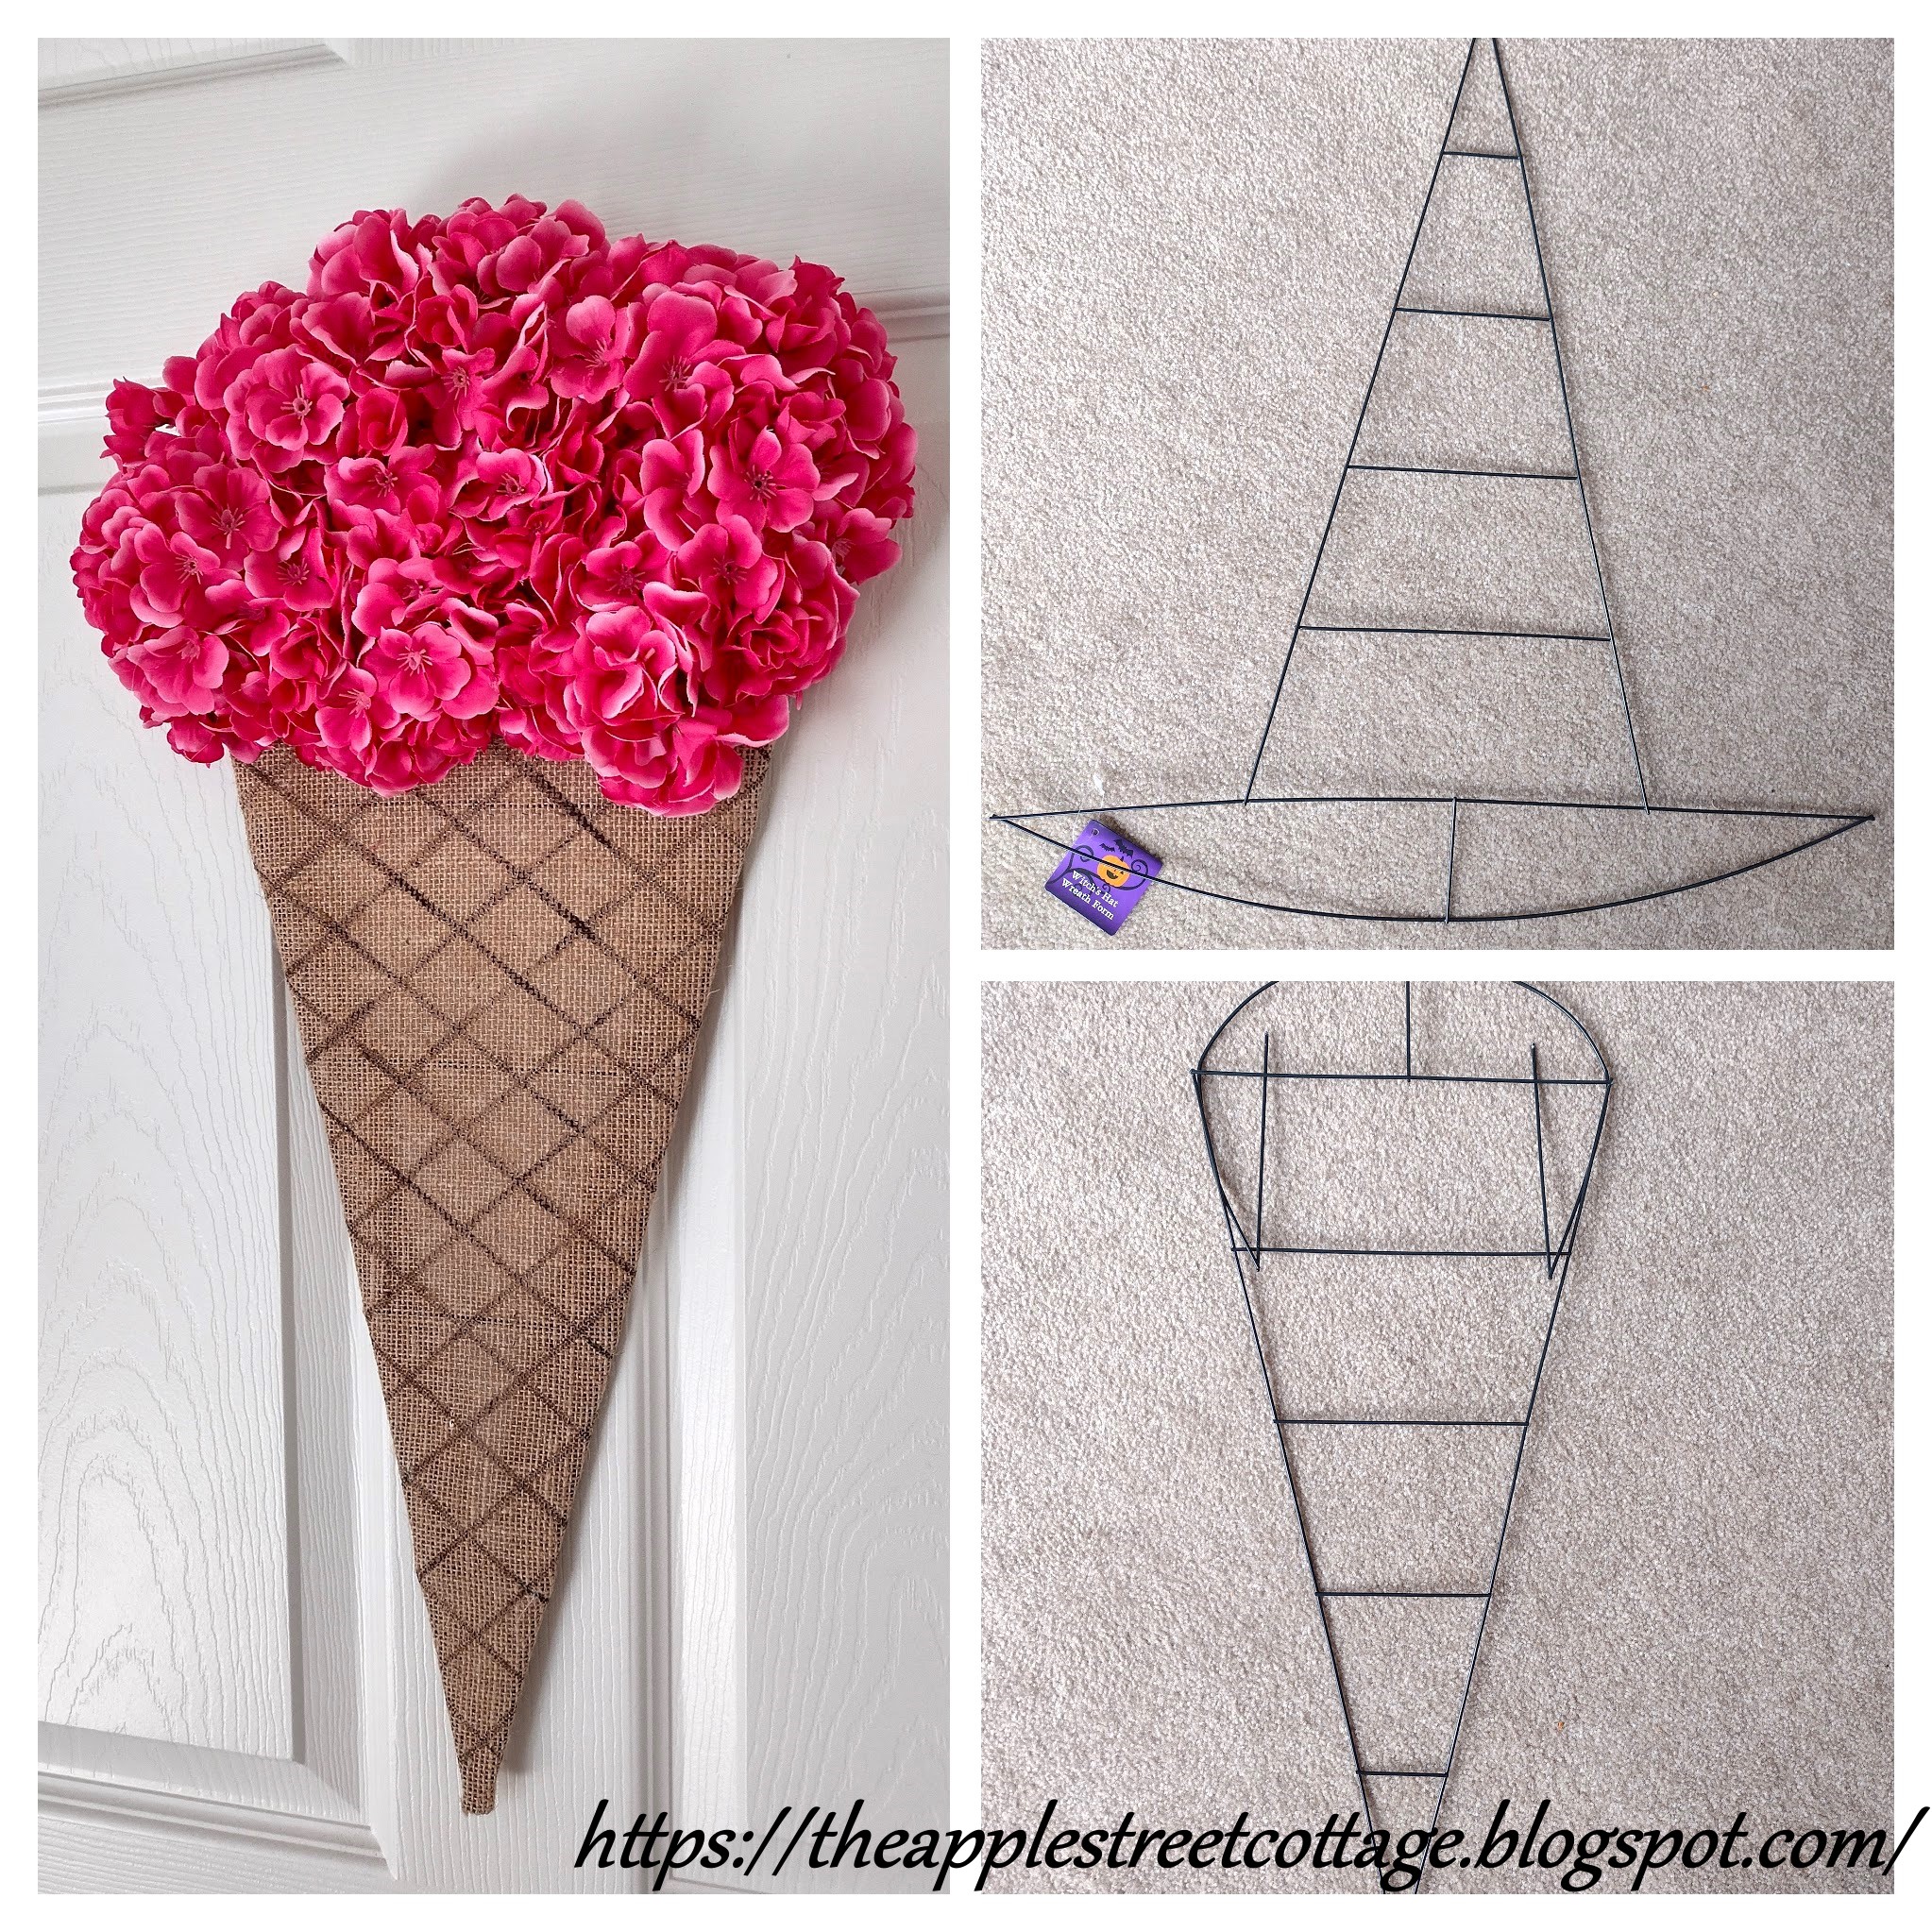
This project started out just like the others, with a witch hat frame from the dollar store.

I snipped the brim and folded it down to create the shape I needed.

After reinforcing the edges with masking tape, I traced the shape/texture of the 'cone' with chalk and a ruler on some burlap.

Then the lines were painted with craft paint.

Since the chalk gives you a thicker line, the paint lines weren't 'exact'.

after brushing off the chalk, the burlap was glued to the frame.

I used three bunches of geraniums from the craft store to create the 'ice cream'.

The leaves were removed and set aside for use in some future project. I haven't figured out what that project is yet, so if you have any ideas, shout them out in the comments!

This is where the 'learning curve' comes in. I decided to push the stems through the burlap to make holes. The problem was the mess I ended up with on the back.

So, I pulled the blooms off the stems leaving the little holes.
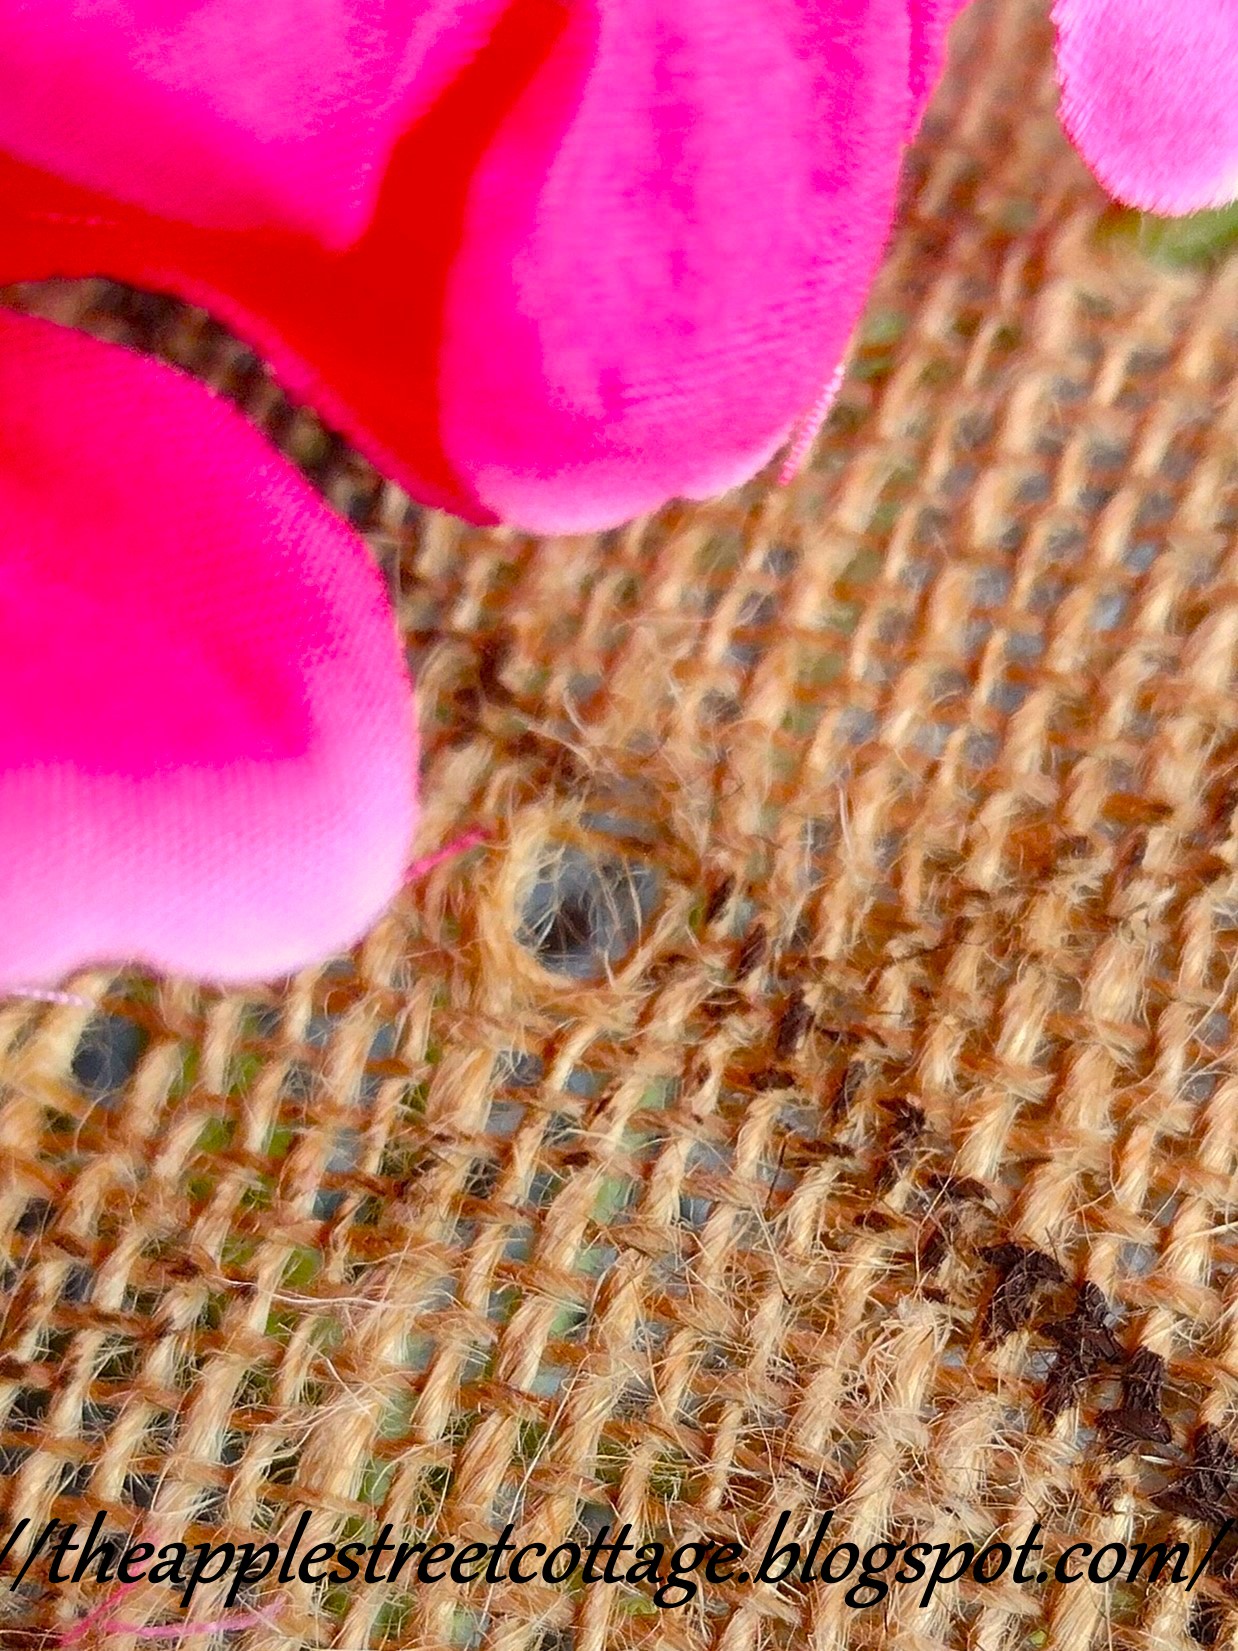
The blooms were attached to the burlap at each hole with hot glue.

In no time at all, the cone had ice cream!

One ice cream cone for Summer:

So, when the witch hat frames show up at the dollar store this fall, be sure to grab a few.....you have projects to make!
Don't forget to PIN IT!

Featured at:


LOVE this idea! I have several paper mache cones that I used to make tussie mussies with...Now I can look into making ice cream cones out of them!! Thanks for the inspiration!!
ReplyDeleteHugs,
Deb
Thank you, Debbie. I'm happy to have inspired you!
DeleteAnn, this is so clever and fun. I ADORE your ice cream cone wreath!
ReplyDeleteThank you, Marie. It was fun to make!
DeleteWow! That is lovely. You are so creative, seeing all these possibilities from a simple witches hat! Those leaves will be perfect for some sort of autumnal crafting I'm sure. They could be painted browns, oranges and yellows couldn't they? Or could you write or stamp letters on them and hang them up as a garland of some sort? Or could you even save them for Christmas and use them as a basis for something festive, a little frosty sparkle on the edges maybe?
ReplyDeleteGreat ideas, Julie! I just couldn't toss them.
DeleteHow cute! You are invited to share this Your Moment blog hop: https://juliejewels.blogspot.com/2022/06/your-moment-blog-hop_01470549944.html
ReplyDeleteThank you for the invitation....on my way!
DeleteBrilliant!
ReplyDeleteThank you, Michele!
DeleteThis is such a great idea! Will have to look out for a wire witches hat now, so I can try this
ReplyDeleteThank you, Natasha. I'm so glad I've inspired you to make one for yourself!
DeleteThat is such a super cute idea! Thanks so much for sharing this!
ReplyDeleteWhat a creative way to re-purpose a piece of inexpensive crafting material! Only a creative crafter would look at the witch-hat frame and think of an ice cream cone. It looks like a cute door decoration or wall-hanging for summer decor.
ReplyDeleteThank you for participating in Talent-Sharing Tuesdays Link-Up 24.
Carol
www.scribblingboomer.com
Thank you so much, Carol!
DeleteI love it! Great idea and great tutorial! I often use oddball leaves to fill in bare spots on other projects like wreathes and the color variations will add interest to however you use them!
ReplyDeleteThank you, Kathy. Filler on wreaths is a great idea!
DeleteWhat a cute craft idea! I'm always amazed at what can be created from Dollar Store items! Good job!
ReplyDeleteThank you, Debbie!
DeleteThis is really cute! Thanks for sharing at My Big Fat Menopausal Life's Share the Wealth Party!! Hope to see you at tomorrow's party too!
ReplyDeleteThank you so much!
DeleteJust adorable. It looks high end too. Thanks for sharing at Funtastic Friday
ReplyDeleteThank you so much!
DeleteSo so cute Anne! What a fun idea for summer! Pinned!
ReplyDeleteThank you, Denise. I appreciate the pin!
DeleteThis is so creative!
ReplyDeleteThank you, Donna. I think I'm out of witch frame ideas...until I think of something else!
DeleteVery creative and looks so pretty! I pinned it!
ReplyDeleteThank you so much. I appreciate the pin!
DeleteI'm i love with this amazing creativity!
ReplyDeleteThat's very sweet of you to say - Thank you so much!
DeleteThis is fun! I think it looks really cute. Thanks for sharing with us at Creatively Crafty #ccbg :)
ReplyDeleteThank you so much, Lydia!
DeleteWhat a GREAT idea! I really wish I bought one of those wreath frames when I saw them:) I'll be sharing this tomorrow morning as a feature of Vintage Charm! Thanks for sharing! xo Kathleen
ReplyDeleteThank you so much, Kathleen. No worries, they should be in stores again in a matter of weeks!
Deletesuper cute and fun. Love the burlap that looks just like the cone! thanks for coming by AAH!
ReplyDeleteThank you so much, Debra. I've had this idea swirling in my head for quite a while and I finally got around to doing it!
DeleteYou've done it again! Beautiful. Featuring when my party opens up tonight!
ReplyDeleteThank you so much, Carol. I'll stop by tonight!
Delete