The Grapevine Wall Planter
Around here the grapevines grow wild. I've been making wreaths with them for a while, but it was time to make something new. It needed to hang and it needed to hold plants/flowers. The idea of a Wall Planter was born!
 This was just one batch. I used 3 batches like this one.
 Here's another shot. You'll also notice I like them LOOOOONG.
 I left the 'curlicues' - I'm sure that's the technical term for them - on.


Let's get started.
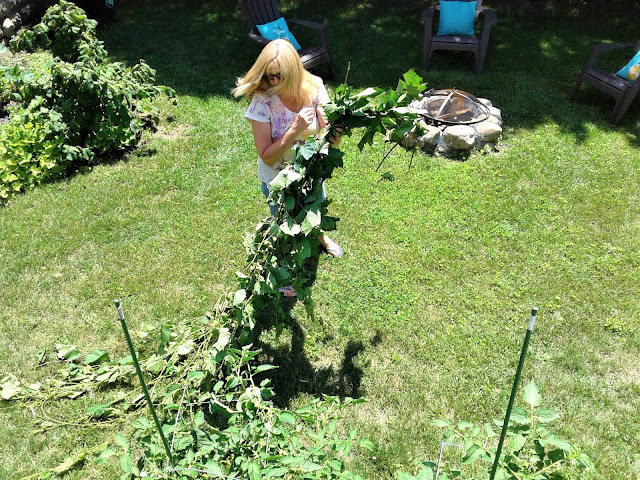
The first thing to do is grab some grapevines.


The next step is to clip off all of the leaves.

Here's the 3rd batch of vines with the leaves stripped:

I made an oval and started winding the vines together.

I continued to twist and wind the vines and added some through the middle to make the edge of the planter.

From that horizontal edge, I added some twisted pieces so I could weave vines through them.

They were added in the front and the back. I curved the front ones out and kept the back ones flat since this planter would be hanging on a wall or fence.
From this point on, the whole process was a lot of weaving and twisting until it was filled-in.

Keep in mind, the vines shrink as they dry, so you'll have to keep adding vines to fill-in any bare spots.

And then it was done!

Since it's too late in the season to plant something new, I lined it with landscaping plastic and went into the garden for some flowers.

Believe it or not, I took this picture on a cloudy day and the colors of the flowers still were 'washed-out'. Here's another one so you can see how pretty they really are:

And, just like that, my 'End of Summer' project was complete and it didn't cost me a thing! If you're not lucky enough to have wild grapevines near your home, I'm sure you can use other vines, just be sure your not grabbing something like poison ivy!
I hope you'll pin, share, comment, and follow. If you click on those 3 little lines at the top left of the blog (on the Home page), you'll see where to find me...or click on the icon below to share.
Featured at:


Well...this is so clever!! I would never have thought of creating such a basket with vines! These would make great gifts, filled with goodies! Well done!
ReplyDeleteThank you, Patti. I'd make them a lot smaller for gifts - less vines needed! lol
DeleteDo you sell these baskets?
DeleteSorry, no, I do not.
DeleteOk thank you!
DeleteWow! I know how much time it took to create that, but so worth it! Beautiful!
ReplyDeleteIt did take time, but it was fun to watch it take shape. Thank you!
DeleteThat's a very impressive grapevine basket you created ~ it looks awesome! I never really thought about the effort it takes to make those, but seeing you dragging all those vines and weaving them sure brings it into perspective.
ReplyDeleteMy husband just shook his head as I was dragging the vines through the yard! Lol I love making things with them, though.
DeleteWow, Ann, this was a serious project!!! I love that you can gather grapevines whenever you need some for a project (at least when the grapes are harvested). Your wall pocket turned out great and it is perfect for real or faux flowers. <3
ReplyDeleteHappy 10 on the 10th day,
Hugs,
Barb :)
I am very lucky that they grow wild EVERYWHERE! Now I need to think of a new project......
DeleteWOW Ann!! That turned out amazing. I love it!! I have to try this one. Thanks for sharing.
ReplyDeleteThanks, Terrie. It was a fun project!
DeleteHow awesome to have wild grapevine. This is a beautiful creation and not sure if I would be able to create a beautiful basket.
ReplyDeleteLooking forward to joining you
Cindy
I'm sure you could, Cindy. It's very easy - weave and twist, weave and twist......
DeleteExcellent tutorial using home-grown grapevines!
ReplyDeleteThank you, Beth!
DeleteThis is very cool - we have these all over our property, so now I'm thinking I need to "harvest" some and do some crafting with vines!
ReplyDeleteYou definitely need to harvest them and have some crafting fun with them! I'm so glad you stopped by and I hope you'll come back again soon...
DeleteWow! That's super impressive. I love it. Well done.
ReplyDeleteXO- MaryJo
Thank you, MaryJo! I'm glad you stopped by - come back again soon, won't you
DeleteAnn,
ReplyDeleteI love your planter. I miss being able to get grapevines. I use to pick them at my Mom's up north but none down here.
Hugs,
Bev
Yes, those grapevines are regional, but I discovered you can buy them online - a bit more pricey, though!
DeleteThanks for stopping by, Bev.
So creative, I really love that you made it into a nest-like basket, so clever and pretty.
ReplyDeleteThank you. I really wanted something that would hang, so I just started....and ended-up with this creation!
DeleteThanks for stopping by!
You are such a clever person, you must have basket weaving in your lineage someplace this turned out great love the flowers you put in the basket. Thank you for sharing onomhgww! I hope you have a lovely weekend!😊
ReplyDeleteYou are so sweet, Karren, but I can assure you, I was 'winging-it' the whole time! The best part was it was really easy. Thanks for stopping by, my friend....
DeleteWow, great turtorial. I've always wondered how to do that! Thanks for sharing this on Farmhouse Friday! Pinned
ReplyDeleteThanks, Cindy. It really is a simple process, it just takes time.
DeleteAnn, this basket is fantastic. Really creative and clever. Thank you for joining us at Meraki Link Party at www.doodlebuddies.net
ReplyDeleteHave a lovely day
Naush
Thank you, Naush. I've never made one before, so it was a lot of fun to create something brand new!
DeleteThats great coz You’re one of my features on the Meraki Link Party this Monday! The party opens at 10 am. I hope you can drop by, Naush !
DeleteThank you so much, Naush. You made my day!
Delete