Ladybug Crossing
Spring is here, or so they tell me, and I can't wait to get out in the garden. As most gardeners do, I love seeing ladybugs and decided a sign was needed.


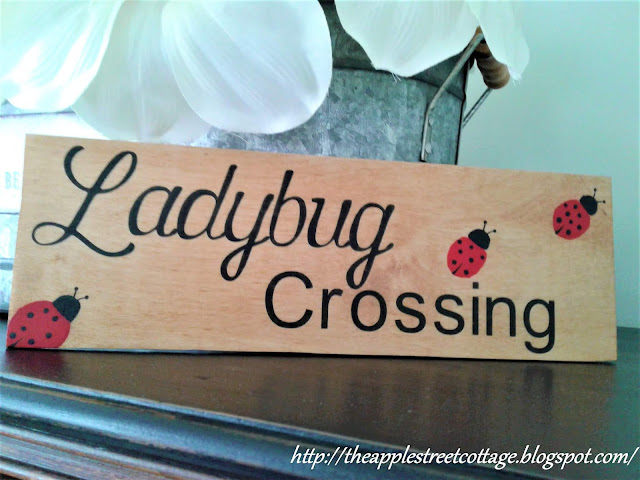


The first thing I did was find a piece of wood in my box of wood chunks - yes, I actually have a box of of wood - and give it a quick coat of stain. Then I went on Design Space and designed my lettering for a stencil. Since stencil vinyl can be expensive, I use contact paper from the dollar store. It's very 'budget friendly'.
When the stencil was in place, I used an old gift card to burnish the edges to prevent the paint from bleeding through. Using black acrylic craft paint, I began stenciling with very little paint - actually, almost a dry brush. This is another way I keep the paint from bleeding.
This was the first coat.
I continued stenciling with light coats of paint until everything was filled-in. The stencil was removed, and I had the lettering done.

With a piece of chalk, I drew my ladybugs on the sign and painted them with more acrylic craft paint.

A few ladybugs later, I was done!

I did give it a few coats of Krylon clear spray for some extra protection and it sits in a local store window with some of my ladybugs:

Not the best picture, but it's the one that was sent to me.

I started making ladybugs a few years ago. If you'd like to see how they are made, you can read that post HERE.
Happy Spring, Everyone!
I hope you'll pin, share, comment, and follow. If you click on those 3 little lines at the top left of the blog (on the Home page), you'll see where to find me...or click on the icon below to share.
Featured at:
Creative Compulsions

Simple Homestead

Funtastic Friday

Happy Spring, Everyone!
I hope you'll pin, share, comment, and follow. If you click on those 3 little lines at the top left of the blog (on the Home page), you'll see where to find me...or click on the icon below to share.
Featured at:
Creative Compulsions

Simple Homestead
Funtastic Friday


That is so cute! Pinned.
ReplyDeleteThank you, I appreciate the pin!
DeleteSUPER CUTE!
ReplyDeleteThank you!
DeleteAdorable! I'm so impressed with your stencil making skills.
ReplyDeleteThank you, Kim, but in all honesty, DS did the heavy lifting!
DeleteThis sign is adorable, love it!
ReplyDeleteCindy
Thank you, Cindy.
DeleteYour sign is super cute and looks good paired with your ladybugs!
ReplyDeleteThank you, Allyson!
DeleteVery sweet and cute!
ReplyDeleteThank you...glad you stopped by!
DeleteSo cute!
ReplyDeleteThank you, Carole! so glad you stopped by...
DeleteAnn, love your ladybugs and sign --- adorable. I've made 3 ladybug theme wreaths over the last year or so and your crafts would go great with them.
ReplyDeleteThank you, Debbee. We both must have ladybugs on our minds!
DeleteThis sign is too cute!! So fun!
ReplyDeleteThank you, Pamela!
DeleteThis is adorable, and great tips for painting too, thanks. Here in the UK we call them ladybirds which we know makes no sense at all but there you go!!
ReplyDeleteThank you. I've heard them called laybirds too. It's a much prettier name!
DeleteThis projects is just so adorable, thanks for sharing pinned.
ReplyDeleteThank you, Anita. I appreciate the pin!
DeleteAdorable! Thanks for sharing at Vintage Charm!
ReplyDeleteThank you, Cecelia. Have a great week!
Delete