Posts

Grapevine Wreaths for the Kitchen
Image
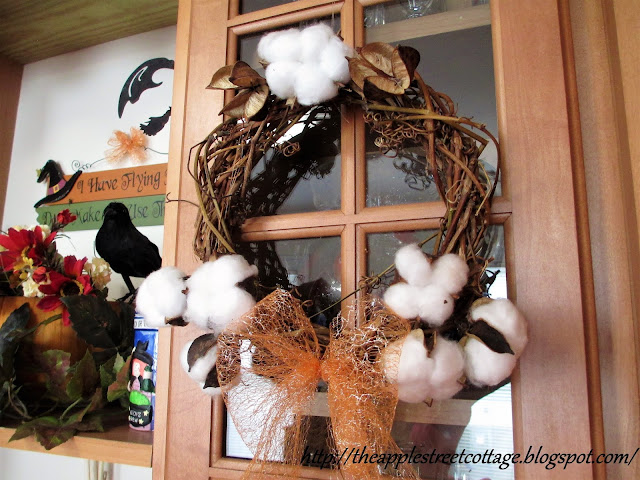
Welcome back!  A few weeks ago I promised to share the details for the grapevine wreaths on my kitchen cabinets.   They are easy to make, you just make a circle and start twisting them together.  If you'd like to see how to get them started, click HERE for the post I did last Spring.   The weather was warmer when I started them and, you'll notice that some of the vines are still green.  That makes it much easier to bend and wrap them.  Be aware though, that those vines will shrink a bit as they dry and you may need to add more to them later on.  Since they grow wild around here that's no problem. To hang them on the cabinets, I measured a length of fishing line and looped it through the wreath.  I tied a knot and used a lighter to burn the ends.  That keeps the fishing line from slipping. Once that was done, the fishing line was hung on the inside, top of the door on a pushpin. I like this method, because it's invi...

This & That - It's Fall!

Image
I've been dealing with a sinus/ear infection for the past month and this second round of antibiotics better do the trick. When I took the time to think about it, I realized the last time I needed an antibiotic was over ten years ago...I guess I'm making up for it!   My energy level hasn't been what is usually is so here's a little 'this & that'... The other day, the morning sun was streaming into the dining room... Our daughter sent us a care package from her recent trip to Italy that included these: My husband added some tomatoes from the garden: Which resulted in this amazing dinner: The day I went back for my follow-up appointment and learned that I still had the sinus/ear infection, he made homemade bread and stew to make me feel better: Yes, he's a keeper!   If you follow me on Instagram, you saw this ironing board that I found at roadside sale for $5: Apparently I was on a roll because I found this child-size one this p...

The Kitchen Shelf - Halloween Style

Image
It's been a crazy weather week around here.  We've had temperatures in the 50s, which is normal for this time of year, but then we had a couple of mid- to upper-70s days.  We're now back to cooler temperatures, I guess we'll call it Indian Summer!  How's the weather in your part of the world? When we first bought our current cottage, I shared some pictures of the kitchen.  One suggestion was to remove the shelf above the sink, but now that we've lived here a few months, I'm glad I didn't.  You see, even though this is an old house, it has no built-in shelving that is always great for decorating.  Therefore, I'm happy to have this space in the kitchen that can be changed seasonally.  Let's take a closer look: This space is just above the sink.  Here's the picture from right before we moved in: You can see it on the left. My goal this year is to spend no money on my fall decorating.  So far, I've achieved it, except for purchasin...

Easiest Applesauce Recipe Ever!

Image
It's Fall and that means APPLES!  Yes, we are surrounded by orchards around here and apples are one of my favorite fruits.  My husband loves applesauce so I thought it was time to share my recipe that is done in under an hour.   Here's what you need: 4 pounds of apples - about 16-20 small apples 1 cup of water 1/2 cup of brown sugar. First, peel and slice your apples and put them in a saucepan.  I used Jonamac, you can use whatever type of apples you like best. Add 1 cup of water  and a 1/2 cup of brown sugar and mix well.  You may want to increase/decrease the amount of brown sugar.  It depends on the sweetness of the apples you are using and how sweet you like your applesauce.  My husband thought this was perfect. Using high heat, bring the apple mixture to a boil.  Reduce heat to low and allow the mixture to simmer, stirring occasionally.  After 30 minutes, this is what it looked like: Remove the sa...

Grandma's Sewing Box

Image
You've seen the meme:  Grandma Had It, Mom Threw It Out, I Bought It Back.  The story of this little sewing box fits it to a 'T'.  While walking through the local thrift store, I saw this sewing box sitting on a bottom shelf.  My grandmother had one just like it and to be honest, I have no idea what happened to it.  But here was another one,  looking pretty humble. The finish was worn, the veneer was chipped, and it was only $2!   It came home with me. The first step was to glue all the loose veneer on the legs: I used wood glue and added binder clips to act as clamps ...there's a little tip for you! After the glue was dry, I  did some filling with wood putty, sanded, and painted the legs, sides, and top with Ocean chalk paint.  After two coats, I distressed the edges and it was time for decoupage! I scuffed the finish a bit with 220 grit sandpaper and wiped away the dust. The Mod Podge was brushed on, making ...

The Fall Porch & How to Over-Winter Mums

Image
It's officially Fall! The Fall Equinox is here, so it's time to get the Fall decorating into full swing.  For my birthday last month, my kids sent me this adorable wagon for the garden.  If you follow me on Instagram, you saw this: Yes, there was some assembly required, but it really didn't take too long.  The directions looked worse than they actually were!  I decided it belonged on the front porch along with my Shabby Planter that I've had for a few years: I also decided to keep the Stepladder out for a few more weeks: Since we moved into a new Cottage and all the mums I've overwintered are probably blooming at the old Cottage, it was time to stock up!  All of the ones you see will be overwintered and planted in the ground next Spring. I never plant them in the ground in the Fall because they just don't have enough time to establish roots.  Here's what I do: Over-Winter Mums: First, if frost is expected but the daytime tem...