Vintage Satin Ornament
November is here and, for many of us, our thoughts turn to the holidays. If you have scraps of fabric taking up space I have the perfect way to use them and create new ornaments for your Christmas tree.
It's time once again for The Sustainable Pinterest Challenge, a group of bloggers who are challenged to recreate a pin from Pinterest focused on sustainability. Many thanks to Julie from Sum of Their Stories for hosting. This month we are sharing something 'Christmas'. My inspiration came from this pin but I decided to 'glam it up' a bit with some vintage satin.
It all started with a clear plastic ornament from the dollar store.
It came with a nice silver cord that could be used for hanging.
Cut a square of fabric large enough to go around your ornament. This was a piece of satin from a vintage wedding gown. I can't give you a size since it depends on the size of your ornament. Wrap it around the ornament and use a rubber band to secure it around the top.
Since rubber bands eventually dry-out and break, also tie a piece of string around it to avoid any future disasters.
Next, glue a piece of trim around the string and rubber band.
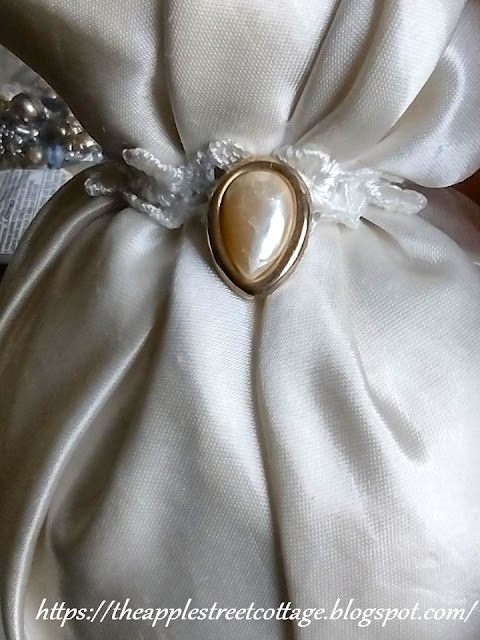
Attach a piece of vintage jewelry with a little dab of E6000...
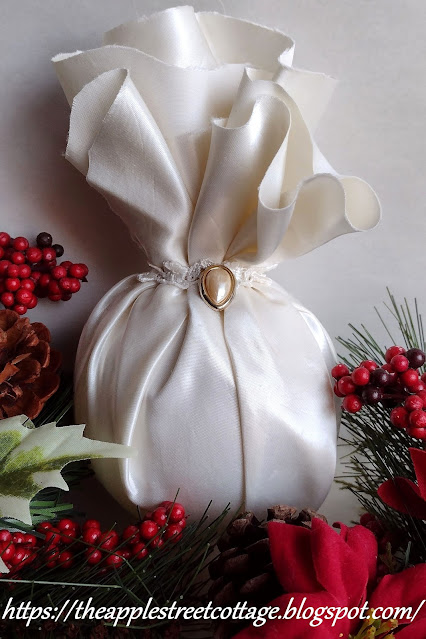
...and your ornament is ready for the tree!
There is one step I forgot and I'm going to go back and do it carefully, since the ornament is already together. Use some anti-fraying glue on the edges of the fabric. No one wants the the edges of their fabric fraying and it's much easier to do before you put it on the ornament.
Pin it!
These ornaments can be made with any fabric you may have - florals, plaids, Christmas prints - they all would be beautiful. I hope you'll take a look at what you have and give it a try!
Featured at:
Be sure to stop by to see what my fellow bloggers have created. It's a blog hop and all of the links are listed below:
Julie | Sum of their Stories
Gail | Purple Hues and Me
Julie | Treasures Made From Yarn
T’onna | Sew Crafty Crochet
Niki | Life as a LEO Wife
Mel | Decor Craft Design
Christine | Christine’s Crafts
Vicky | Vicky Myers Creations
Donna | Modern on Monticello
Allyson | Southern Sunflowers
Ann | The Apple Street Cottage
Jo | A Rose Tinted World


That is so pretty Ann, I love the extra glam from the jewellery too, perfect for a sad lonely earring that's lost its mate or broken necklace. You could even use this idea to makeover old tatty Christmas baubles if you didn't want to splash out at the dollar store!! Great tip about the fray check too and applying it first - you make these mistakes so we don't have to :-)
ReplyDeleteThis would be a great makeover for an old Christmas bauble. As for the mistakes, I make them all the time! HaHa!
DeleteWhat a lovely take and design created from the pin! Love the satin fabric and the embellishments! Happy crafty holidays!
ReplyDeleteThank you, Gail. The satin gives it an elegant look, but it's also simple - one of my favorite looks!
DeleteThis is so simple but so effective. We could all make these! Thank you for sharing.
ReplyDeleteAbsolutely! Head to the thrift store for old gowns and you're ready to start!
DeleteSuch a pretty and easy project! Using different sized ornaments would give an interesting look on your tree.
ReplyDeleteDifferent sized ornaments are a great idea, Zenda. Thanks!
DeleteFor a simple Christmas craft, you've made your ornament look so luxurious. What a wonderful gift it would make for a friend or as a hostess gift!
ReplyDeleteThanks, Allyson. The fabric really makes all the difference. I think lace would be another beautiful option.
DeleteI love the classy, vintage look! This would be a great way to package a small gift as well. Pinned!
ReplyDeleteThanks, Niki, and this was very easy to make!
DeleteYour satin ornament is really pretty. I really like the vintage jewel you added.
ReplyDeleteThank you so much!
DeleteMy mind has immediately thought of beautiful bits if jewelry you can find in charity/thrift stores which can be given a wonderful lease of life with this great christmas project.
ReplyDeleteYes, I bought a bunch of it at an estate sale a few years ago and I always dig through it for projects
DeleteCute idea - I am starting to plan for Christmas, too!
ReplyDeleteThanks, Patti. I just can't do anything Christmas before Halloween!
DeleteThat is very sweet. I love anything vintage for the holidays!! Happy November!!
ReplyDeleteHappy November to you, too! Now that Halloween is over, we can start on the holidays!
DeleteThis is a beautiful idea! Thanks for sharing this DIY.
ReplyDeletexoxo
Lovely
www.mynameislovely.com
Thank you. I'm so glad you like it!
DeleteThank you so much!
DeleteThat is lovely!
ReplyDeleteThank you so much, Joanne!
DeleteLove this DIY vintage ornament! Thanks for sharing at Vintage Charm. xo Kathleen
ReplyDeleteThank you so much, Kathleen!
DeleteThis satin ornament is so pretty and feminine! I've never seen one like it. The little pearl embellishment and the lace finish it off so nicely. Thank you for sharing this post in the Talent-Sharing Tuesdays Link-Up 40.
ReplyDeleteCarol
www.scribblingboomer.com
Thank you so much, Carol. I love to make unique things!
DeleteHow pretty!! #YourMoment
ReplyDeleteThank you.
DeleteAnn, this is such a beautiful and elegant ornament. So glad you shared it for some inspiration.
ReplyDeleteThank you so much, Donna!
DeleteThese are so elegant! But I could also so see these in a plaid or buffalo check. Thank you for sharing.
ReplyDeleteThank you, Jo! Any fabric can be used, depending on the look you want.
DeleteIt's so elegant and pretty Ann.
ReplyDeleteThank you for sharing your vintage satin ornament project at Create, Bake, Grow & Gather this week. I'm delighted to be featuring it at tonight's party and pinning too.
Happy fall,
Kerryanne
Thank you so much, Kerryanne. I'm on my way to the party!
DeleteThanks for posting at My Big Fat Menopausal Life's Share the Wealth Party! Hope to see you at the new party this week!
ReplyDeleteHappy to share - Thanks for hosting!
DeleteSimple enough and elegant too.
ReplyDeleteThank you, Julie. Sometimes 'less is more'!
DeleteWow, significant, I learned a lot, thanks for sharing :)
ReplyDelete