Making Birdhouse Gourd Lanterns
Everyone is transitioning into Fall. I don't know about you, but, in my world, Fall doesn't arrive until the day after Labor Day. My birthday is the end of this month and believe me, I always remember the 'Dog Days of Summer' during my birthday parties as a child. My mother wouldn't even bake a cake because it was so hot! Don't worry, she'd run out and buy something.....
The bottom line? August is just too early for pumpkins in my world.
But enough about that. The lanterns I'm about to share can be used all Summer and into Fall so let's get started!
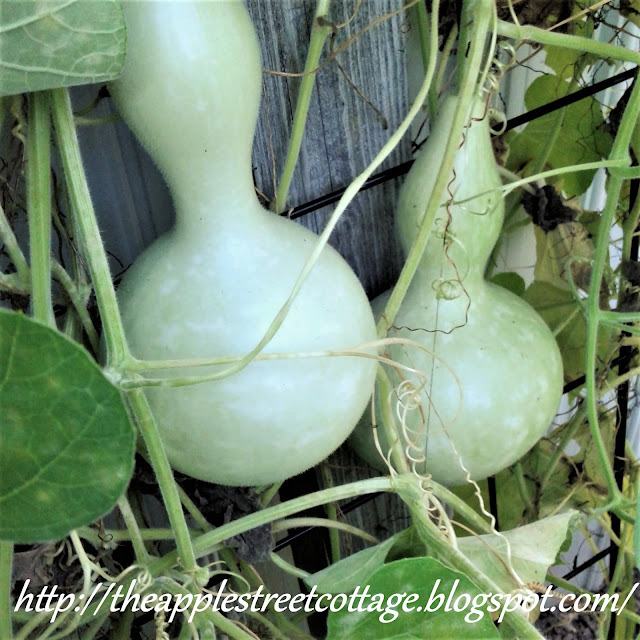
This is a 'first' for me. Last summer I decided to try growing birdhouse gourds. The vines grew great, but the flowers weren't being pollinated. The problem? The flowers bloomed in the early evening and all the bees were already tucked in their beds! I decided to take action and started hand-pollinating with a q-tip. It worked - far be if from me to have to wake up the bees!
These are the two gourds that survived. After extensive reading, I learned that when the stem starts to turn brown you can cut them from the vine. The two above were cut when that happened. I also read that the gourds could stay on the vine - some people said they even left them there all winter. So I tried it. The first frost came and that was the end of them.....I think someone lied!
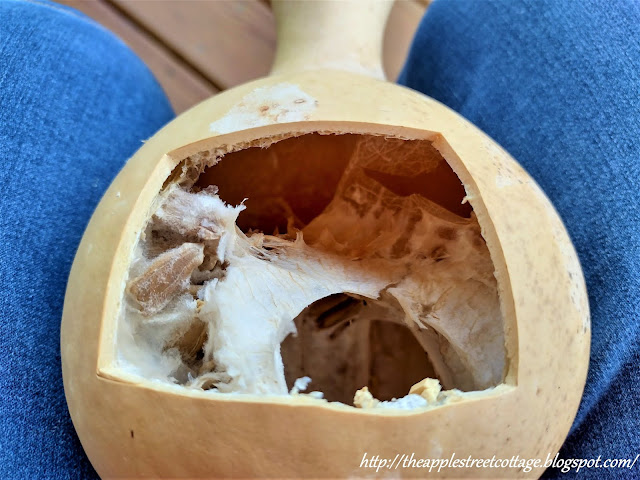
In the Spring, I washed them with a bleach solution because they were covered in mold (yes, I wore a mask). One had a couple of soft spots, but I decided to take my chances. After they dried, I smoothed them with fine sandpaper and decided where to cut the hole - yes, I chose the soft spot on the one. At first, I thought I'd drill a few holes close together to get started, but then realized it was easier to use a utility knife.
This is what I found inside:
The dried pulp and seeds removed:
Here's a peek at the inside:
I grabbed my trusty drill and started drilling some holes with different sized bits.
Notice the pattern on the gourd - that's from the drying process and the mold.
More holes drilled and it looked like this:
When I felt I'd done enough drilling, I decided to give it a coat of light stain. I chose pecan.
It wasn't a dramatic difference, but I guess you could say it 'enhanced' the color. If you look carefully at the picture, you can see the difference in the top part that hasn't been stained yet.
I sprayed it with clear sealer - inside and out, added a battery-operated tealight and waited. When it was finally dark enough, I had this:
Doesn't it look like it's glowing?
The other gourd got the same treatment, but I used a darker stain - Red Mahogany. I tested it on the piece cut from the back:
I liked it so the whole gourd was stained (after drilling the holes).
Here it is lit:
This one doesn't seem to 'glow'. I'm wondering if it's because of the darker stain? Or, maybe it's because it's darker.
I didn't grow any gourds this summer and since it's been such a strange, wet summer, it probably was a good decision. Maybe another year.
For now I'm pleased with my experiment and I hope my lanterns will last a long time.
How about you?
When does Fall start in your world?
Have you ever grown birdhouse gourds?
Have you had success?
Let me know - I'd love some tips!
I hope you'll pin, share, comment, and follow. If you click on those 3 little lines at the top left of the blog (on the Home page), you'll see where to find me...or click on the icon below to share.
Featured at:


Cute!! I used to paint mini ones like Santa for ornaments!
ReplyDeleteI'll bet those ornaments are adorable. I'd like to try painting some....now I just need more gourds!
DeleteThose are awesome! I'm no gardener, but I love to purchase a few this fall and try it out. And I'm with you. I hold onto beachy summer days until the calendar officially says it's time to let go...
ReplyDeleteThanks, Kim. I'm thinking of buying a few to try a few other ideas. Be sure to wear a mask - that advice was repeated over and over with everything I read.
DeleteI have some of these growing in my garden, so I will give this a try!
ReplyDeleteI can't wait to see yours!
DeleteOooh, I like this idea so much! I didn't grow any in the garden this year but I need to add them to the list for next year.
ReplyDeleteOh, you do, Marie! They are so much fun to work with, I just wish I had more of them.
DeleteSo cute! I bought a handcrafted gourd this shape - it was painted to make it a ghost for Halloween.
ReplyDeleteI'll bet it's adorable! I've seen them painted so many different ways.
DeleteI love them. I grew a few gourds this year accidentally. They sort of sprouted up all over the place…I think the squirrels who ate some of last years gourds had something to do with that.
ReplyDeleteThese are AMAZING! I want some, however, I can't find these kind in my area if NJ.
ReplyDeleteI have looked many times. Many dry them and have them for years.
Thank you! This was a first try for me. Now I want to try some different techniques...a friend gave me a wood-burning kit for my birthday. If I find some, I'll send you a few!
DeleteI love this idea!! Pinned - I'd be so honored if you shared it on the Share the Wealth Party at My Big Fat Menopausal life.
ReplyDeletehttp://bigfatmenopausallife.blogspot.com/2021/09/share-wealth-ii-second-installment-of.html
Thank you so much - and I'd be happy to share it at your party. On my way......
DeleteI'm so glad you joined the Share the Wealth party at My Big Fat Menopausal Life. Can't wait to see what else you'll bring! Thanks.
DeleteI'm happy to share!
DeleteThis is super cute. Great DIY tutorial too. Thank you for sharing it with us. We are featuring it over on the Farmhouse Friday LP this week. Hope you link up again soon.
ReplyDeleteThank you so much, Cindy!
DeleteGorgeous. Or should I say "gourdgeous"? Featuring when my link party opens up tonight!
ReplyDeleteThank you so much, Carol. I love your sense of humor!
DeleteThank you for sharing this on Traffic Jam Weekend. It has been chosen as a fave feature for this week's link party that went live on Thursday at 5:00 pm CST.
ReplyDeleteThank you so much for the feature!
DeleteAnn, this is so pretty! Well worth the work of gutting, carving and and drilling. I love little lights, so perfect for fall and winter months.
ReplyDeleteThank you so much, Rita. They are really easy to work with!
Delete