Chair Back Shelf
This is Project #2 from the same chair. You may remember my Fairy Godmother visits that resulted in some wonderful goodies. For this project I used pieces from one of the chairs and the old drying rack that I ended up taking apart.

Creating this was a lot of fun, but before we get started, let me welcome you back to the 'Do It Over' Designers blog hop. We are a group of bloggers who love to recycle/upcycle/DIY. I'm happy to host this blog hop and I hope you'll visit everyone to see what they have to share with you. Their links will be listed at the end of this post.
Here is the chair:

It was nothing special and nothing I wanted to use in my house, so I cut the back off.

Ta-Daa!
A piece of wood was attached to be a shelf.

I cut 2 pieces from the old drying rack and screwed them to the back so it would have stability against the wall.

The arrows point-out the two pieces:

You can see I stained the shelf and the bottom piece with walnut stain. When it dried, they were taped-off and the rest was give two coats of Peacock chalk paint.
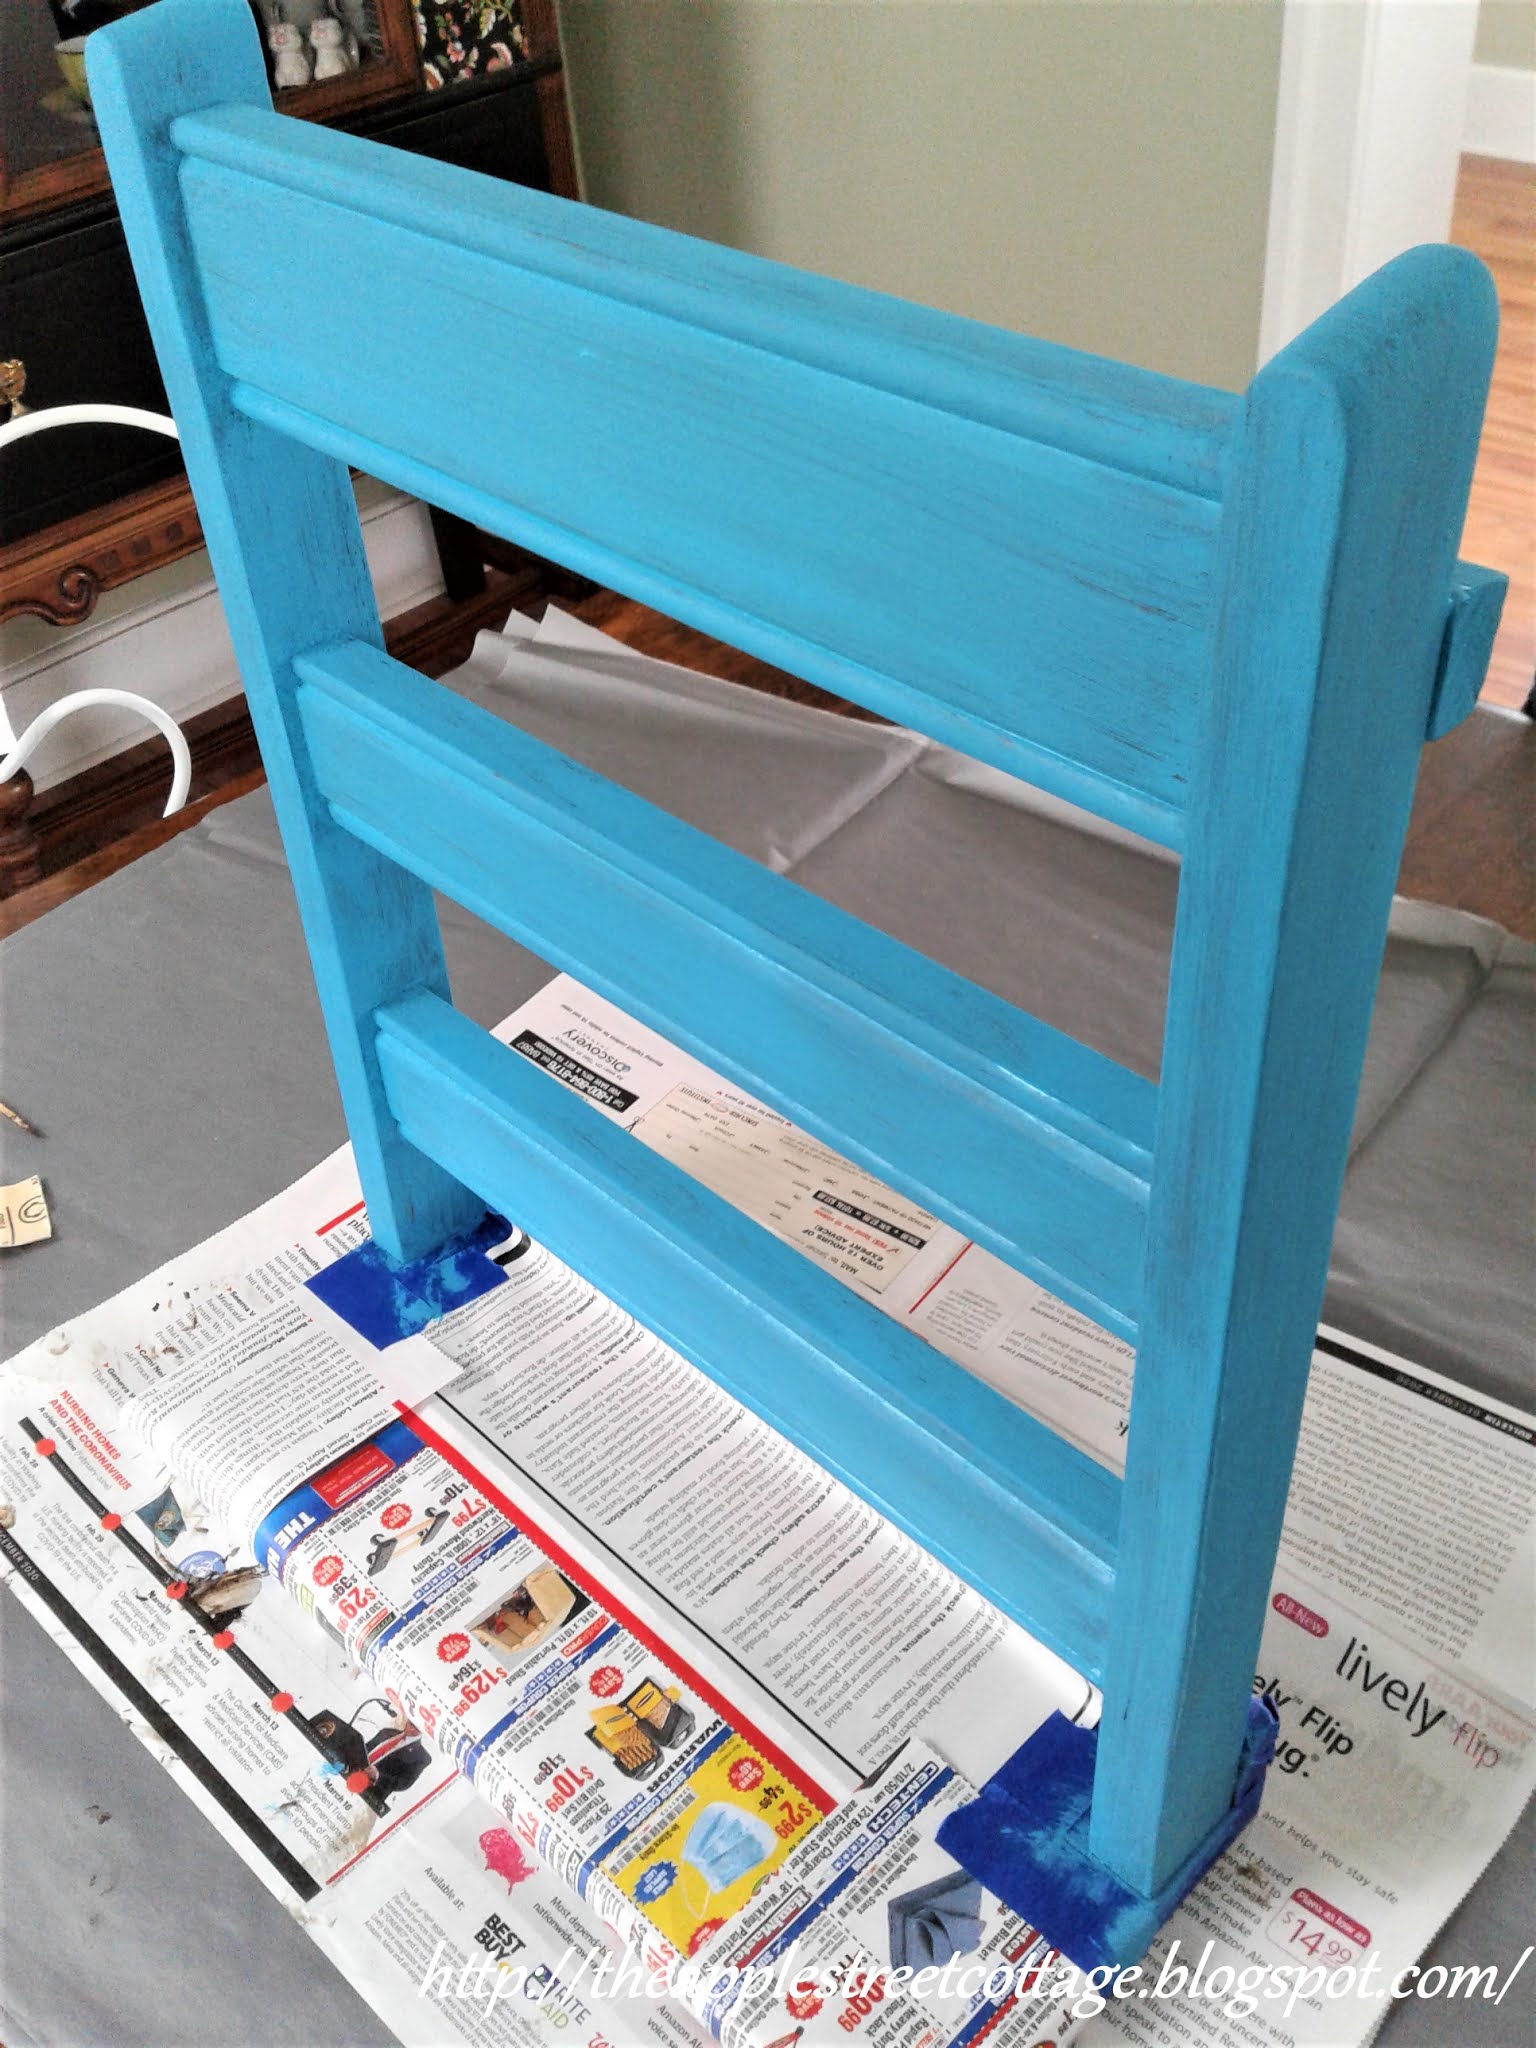
After the second coat, I distressed some of the edges.

With two coats of polycrylic applied and dried, it was time to hang it on the wall.

Then it needed decorating.

Since I made it for my craft room, I made the towel to fit the theme.

The colored pencils were a gift from a student. I've never used them because they are made from tree branches and are just too pretty to use!

In case you were wondering what happened to the the rest of the chair, that project can be found HERE. It's a table!
One chair=Two new pieces!
Now it's time for more ideas.

The 'Do It Over Designers' have been working hard and are ready to share their projects. Be sure to stop by - all the links are listed below!
Featured at:


Ann, that is just outstanding...and I adore the color! Wow. The towel is darling, too. Great combo!
ReplyDeleteThanks, Kim. Peacock chalk paint is one of my favorite colors!
DeleteThis is so creative and a terrific idea for your craft room. Ann! What a fabulous upcycle/recycle project!
ReplyDeleteThank you, Gail. I've been wanting to make one of these for quite a while but I needed the right chair. My Fairy Godmother pulled through for me!
DeleteI love everything about this project Ann from the paint to the distressing, but how you put it all together? It's amazing! I might have the steal this idea for my own craft studio :) How did you make the towel; will you have a tutorial on that too?
ReplyDeleteSteal away, Sara! It was actually pretty easy to put it together, thanks to my scrap pile. The towel was designed on Design Space and I used my heat press to put it on the towel. A tutorial is a possibility! I also modified it for a shirt.
DeleteI love this Ann!! You get so many great pieces to makeover. Perfect as always!
ReplyDeleteCindy
Thank you, Cindy. Yes, my Fairy Godmother was very good to me!
DeleteI love this Ann! I love that you use all possible parts of something, a woman after my own upcycling heart!!
ReplyDeleteTania
Thank you, Tania. I just KNEW those drying rack parts would come in handy!
DeleteVery clever - our Parade of Homes had some in one of the homes and they were all painted white, on a wall heading upstairs, with photos and plants - yours reminds me of them!
ReplyDeleteWhat a great way to use them...you don't happen to have a photo, do you?
DeleteThis is very creative Ann, you did and amazing job. I love how you chose to decorate it too.
ReplyDeleteThank you, Anita. This is a project that's been on my list to try for a long time. I'm glad I finally did it!
DeleteThat is so cute, and I love the rack of the chair back to hang things on.
ReplyDeleteI've had the idea in my head for a long time. I'm glad I was finally able to make it a reality. Thanks for stopping by, Rita!
DeleteThis is definitely the most creative way I have seen someone upcycle a chair. So very clever and perfect for your craft room.
ReplyDeleteThank you so much, Donna. I'm pretty happy with it!
DeleteThis is darling. Visiting from the wonderful wednesday link up.
ReplyDeleteThank you so much!
DeleteWhat a fun project! Almost like a miniature blanket ladder but better because it's from an old chair!
ReplyDeleteAlexandra
EyeLoveKnots.com
OnRockwoodLane.com
Thank you, Alexandra. That's a great way to describe it!
DeleteThat is such a great idea! Thanks for sharing with us at Encouraging Hearts and Home. Pinned.
ReplyDeleteThank you for the pin, Joanne. I appreciate it!
DeleteGreat idea for repurposing an old chair back!
ReplyDeleteThank you, Marie!
DeleteWhat a repurpose! Love it! Thanks for sharing at Vintage Charm. xo Kathleen
ReplyDeleteThank you, Kathleen!
DeleteWhat a fun project! I clicked through to see the table, too. I love it! Thanks for sharing your awesome upcycle with us at Creatively Crafty #ccbg :)
ReplyDeleteThank you so much, Lydia. I'm glad you like them both!
Delete