'Tiled' Kitchen Backsplash
It's time to finally share the home improvement project that took me most of the summer to complete. It wasn't a difficult task, it just took forever to finish, but more about that later...
Behold, the new kitchen backsplash:
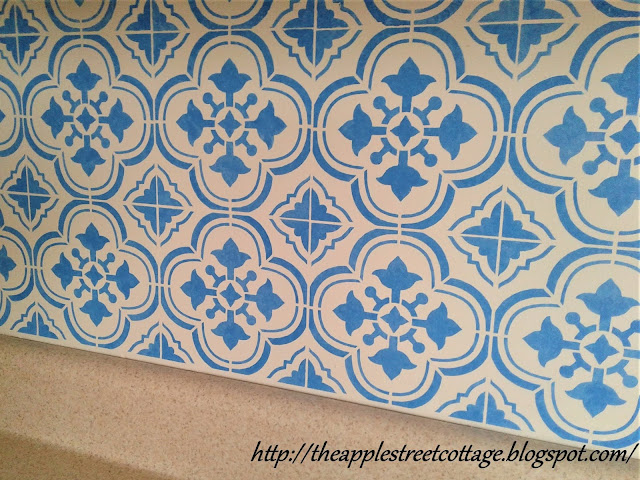


When we moved in last year, the backsplash was painted white - nothing special. I knew I wanted to do something, but there are SO many choices. I finally decided on a stencil and paint because it's not permanent and if I hated it all I needed to do was paint over it! I chose this stencil...

...and then chose a shade of blue called 'Peaceful River' since blue is my favorite color. I bought a sample can of paint and had more than enough. The entire backsplash was painted with a stencil brush. I know lots of people use a foam roller, but, honestly, in my opinion, there is always bleeding of paint with that method. That may be part of the reason why this project took all summer. But, I'll get to that later.. because there was prep work in the name of old caulk:

As you can see, it was thick, it pulled off part of the sheetrock coating, and there was a lot of it!

I fought the caulk and I don't know who won!
After patching and repainting the backsplash, I was ready to stencil. I started at the bottom and after the third 'tile' I realized my shoulder was starting to ache. Let's just say reaching across the counter and bending wasn't the best thing for me. So I took a break. The maximum number of tiles stenciled in a row was 5 before my shoulder screamed for me to stop. As I moved up and was working under the cabinets, my neck and vertigo had something to say. At one point I was on my stomach, on the counter with one foot on the floor. Thankfully, there are no photos of that (although my husband was tempted), but the amount of time I could work under the cabinets was limited. I was then averaging 3 tiles done before needing a break. To be honest, there were moments when I asked myself why I started this project.
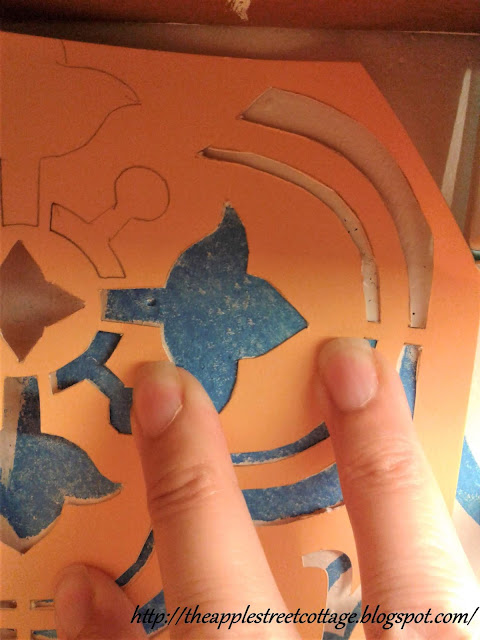
In spite of it all, things were going along just fine until I had to get into corners around the shelf over the sink and under the stove hood. There was no way this stencil was going to bend the way I needed:

Time to get creative!
Since I didn't want to cut up the stencil, I pulled out a piece of cardstock and traced the stencil on it. Then, with an exacto knife, I proceeded to cut out the stencil on the cardstock.

It was far from perfect, but I didn't mind cutting this one up to fit in those corners.

By the time I was done, this is what the cardstock stencil looked like:

I sure made a mess of it!
This pic shows how those corners turned out:


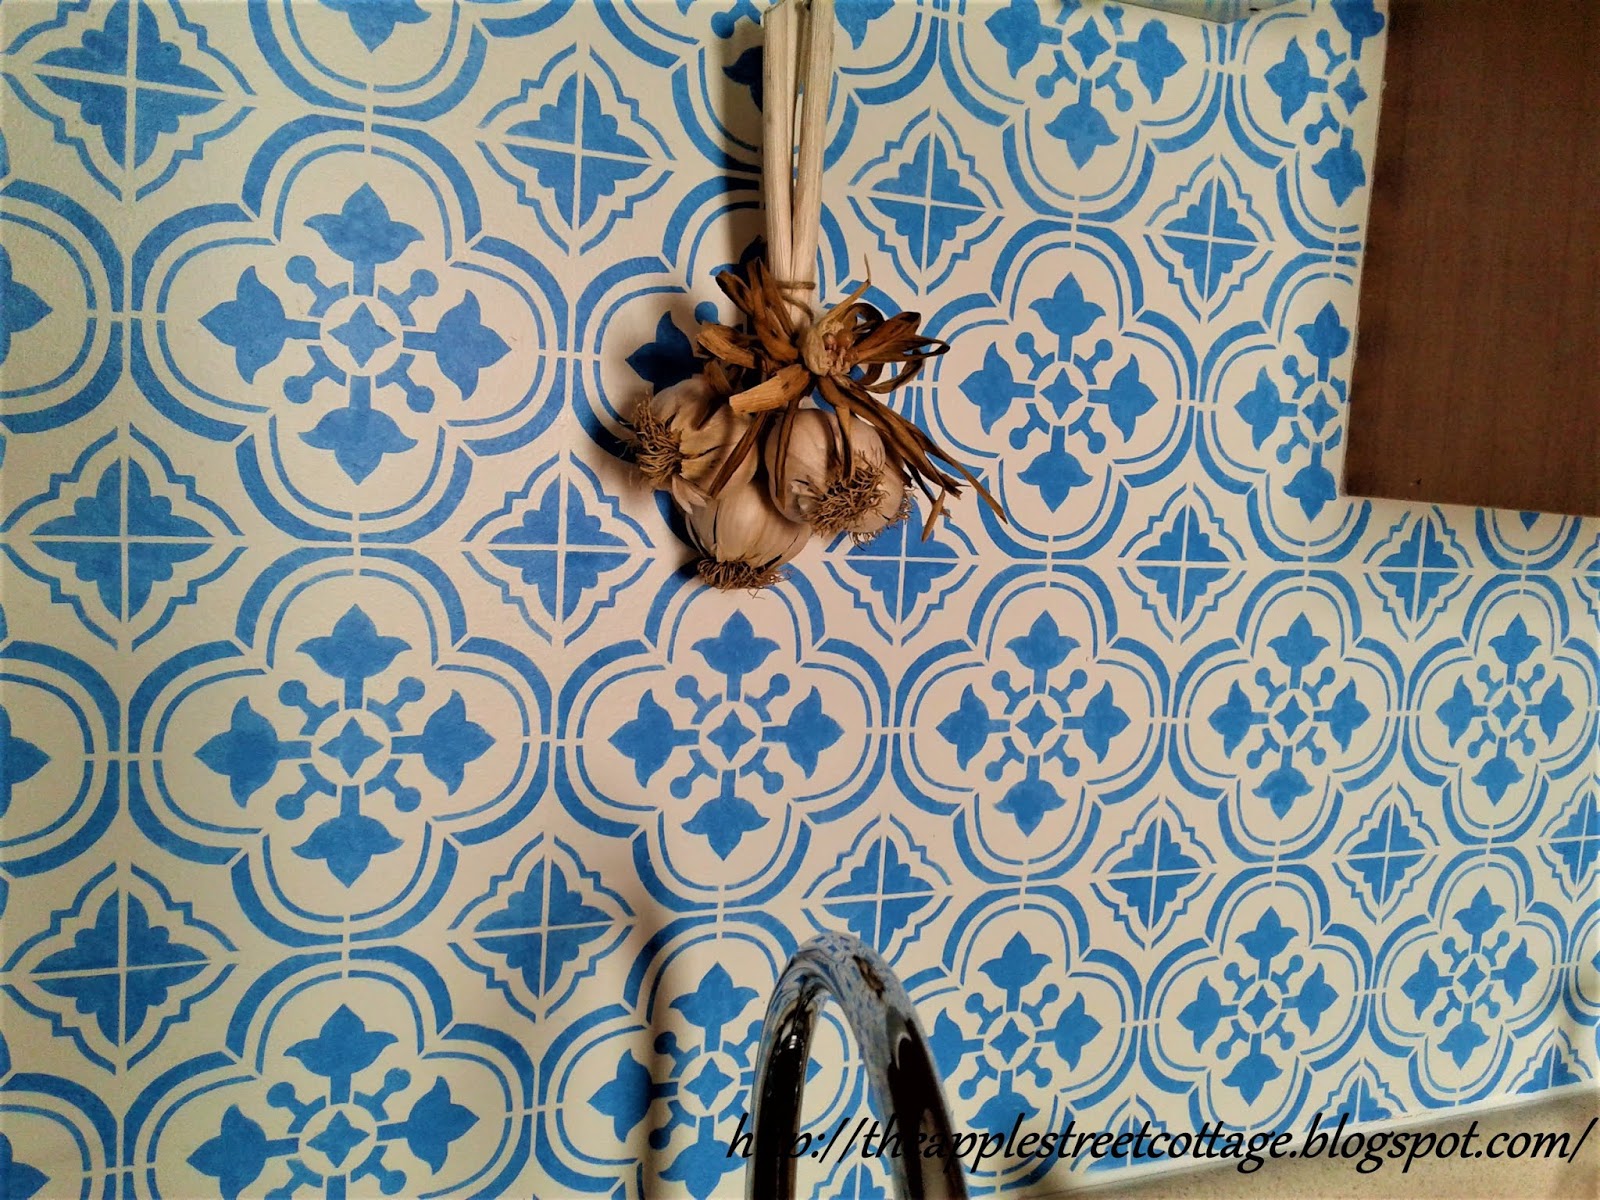
Just one more shot:

So, there are 3 questions:
1. Is it perfect? No
2. Am I going to show you my mistakes? No, although you may spot a few in the photos.
3. Would I do it again? No.
If I was younger and didn't have vertigo and neck/shoulder issues, I'd probably do it again.
I will say I absolutely love the look and the color. My next project is finding fabric to match for curtains. That will be the perfect project for when the weather turns cooler and I can't work on other projects outside.
Thank you so much for stopping by. I hope you'll be back soon since my fall projects will be coming up soon!
I hope you'll pin, share, comment, and follow. If you click on those 3 little lines at the top left of the blog, you'll see where to find me...or click on the icon below to share.


Great project, thanks for sharing
ReplyDeleteThank you - glad you stopped by!
DeleteHi! I think it looks beautiful!!! Well done!!! I love doing little projects like that myself and they may not be perfect but they make me feel very proud!!! So good on you!!! 👍👍👍
ReplyDeleteI tend to be my own worse critic, but you're right, there is great satisfaction in doing it yourself! Thank you for stopping by. Come back again soon, won't you?
DeleteI was wondering if beginning in the corner with full stencils on either side would have worked out so your stencil didn't get messed up? Horrible with math, but what do you think? I am going to try this, thanks so much for the inspiration!
DeleteBecause this was the space over the sink and stove, there was no way around it, since I started in the corners of the main walls.
DeleteVery pretty!
ReplyDeleteThank you. I'm so glad you stopped by!
DeleteIt looks great, but I can just imagine how much work this was. Pat yourself on the back!
ReplyDeleteIt was a lot of work, but I'm glad I did it.
DeleteVery nice. I love the color.
ReplyDeleteThanks, I think the blue really brightened up the room!
DeleteWow! That is truly amazing. I am so impressed with your imagination, your skills, your card stock stencil and your stamina! Totally worth it and now I can't wait to see what you choose to put on the windows.
ReplyDeleteAww, thank you, Kim. You are too kind! As far as the windows are concerned, I can't wait to see what I can get for a deal! LOL
DeleteWow that truly looks amazing, good for you sticking with what had to be a tedious project!!!
ReplyDeleteThank you, Debbie. It was tedious, but I'm glad I did it!
DeleteIt came out great! you did a wonderful job!
ReplyDeleteThank you so much. I'm so glad you stopped by!
DeleteGreat project!
ReplyDeleteThank you, Pamela. I'm so glad you stopped by!
DeleteHi Ann!
ReplyDeleteYou did a great job on your backsplash! I can't imagine taking on that task, but you sure stuck with it to the end. Well done! Thanks for sharing at Homestyle Gathering!
>>> Kim
Thank you, Kim. It was a little more than I bargained for, but I'm glad I did it!
DeleteUm, I'm thinking that your post is telling me never to attempt stenciling! I'm sure that I could not get it to look as good as yours does!
ReplyDeleteLiberty @ B4andAfters.com
Don't feel that way, Liberty! There are plenty of mistakes when you look closely. I told my husband that anyone who looks that closely, can't be my friend! lol
DeleteGreat job, Ann! I'm thinking of doing something similar to my floors... we'll see!
ReplyDeleteI've seen stenciled floors and they are beautiful. Keep me posted on your project!
DeleteYou did a wonderful job, this is beautiful and it looks like real tile. No one can see any mistakes, if there are any. great job!! I'm featuring this post on All About Home on Monday evening. thanks for joining in!
ReplyDeleteThank you so much, Debra! My neck and shoulder sure do appreciate the feature.
DeleteWow, that does look like a lot of work. I'm glad you were honest about whether you'd do it again, so people can learn from your experience. It turned out fabulous!
ReplyDeleteThank you, Crissy. Since is was so much work, I'm really glad I loved it once it was done!
DeleteThis is beautiful, even if it did nearly kill you doing it! I've had theat 'why did I start this?' moment half way through some projects so I'm very impressed that you soldiered on and finished it. Have you had to seal it in some way? I'd love to brighten up our kitchen in some way but I'm a messy cook so I'm not sure it would cope with me!
ReplyDeleteThanks, Julie. I have not sealed it and I'm a messy cook too! I used an eggshell sheen and and have splattered spaghetti sauce, cake batter, and paint(from cleaning brushes in the sink) and it's all wiped off with no problems. You should be just fine!
DeleteIt's adorable. I have vowed never to stencil a wall again either. I hope your neck is feeling better by now. Cute back splash for sure.
ReplyDeleteThank you, Katie. My neck is very happy that it's done!
DeleteI love your backsplash...it looks so beautiful! This gives me ideas for my own kitchen, lol!
ReplyDeleteThanks so much for sharing on Farm Fresh Tuesdays! I can't wait to see what you are up to this week!
Thank you, Lisa. It really is a great way to change your looks without spending a lot of money.
DeleteIt look amazing! I had thought of doing this but to be honest back, neck and arm issues have been the reason I haven't.
ReplyDeleteI may try it this summer when I can really space it out and only do a few at time like you did.
Thanks so much for sharing at TFT! https://followtheyellowbrickhome.com/gorgeous-fall-decor-and-vintage-treasures-at-tft/
Thank you, Amber. If you do it, just be prepared for it to take some time. After all was said and done, I was glad I did it!
DeleteWell done Ann. As some one who suffers the odd vertigo attack, I commend you on getting your stencilling completed. That wouldn't have been easy. It looks great too!!
ReplyDeleteThank you for sharing at Create, Bake, Grow and Gather this week.
Hugs,
Kerryanne
Thank you Kerryanne. No one can appreciate vertigo until they've experienced it. I'm so glad you stopped by!
DeleteJust came across this post, and I think it looks beautiful! I know what you mean about the backaches, etc at our -ahem- advanced age (I thought I would be much older before I felt this old!) One recommendation, as a retired interior designer: next project, find the fabric first. You can make the paint any color, and therefore match the fabric. If you select the paint first, you will be forever searching for matching fabric, as I suspect you have discovered. But great job.
ReplyDeleteGreat tip, Beth. Thank you. I also thought I'd be older before I felt this old. Lol!
DeleteFabulous job! I didn't see any of your mistakes and love the look. If you want fabric that is the same, I have been told you can have it made to match exactly. Don't know tons about it just FYI. Can't wait to see what you think of next.
ReplyDeleteThank you so much and I hope you'll be back for more of my adventures!
DeleteI think you did a marvelous job! I have the same issues as you, with shoulder and back pain and bad vertigo. But your results are amazing. Thank you for sharing with us.
ReplyDeleteThank you so much! Neck/shoulder pain and vertigo sure do make projects more interesting, don't they??
DeleteWhy not make matching curtains with the same stencil? Love how your back splash turned out!
ReplyDeleteThat is a possibility - thanks for the idea, Lisa!
DeleteThis is beautiful !!!
ReplyDeleteThank you!
Delete