Dressing Table Bench Makeover - Plan C
You know the story behind the best laid plans, right? Well, this little bench fits it to a 'T'!
 I found it in a little shop for $8 and since I needed a bench for my Dressing Table Makeover, it came home with me.


The legs didn't really match, but it was the right size and would do until I found the one I really wanted.
The seat was hot-glued on, so that popped right off, and since it had a ton of chippy paint I got out the Citristrip and started coating it.

I covered it in plastic wrap and left it overnight.

This is what it looked like in the morning when the plastic wrap came off:
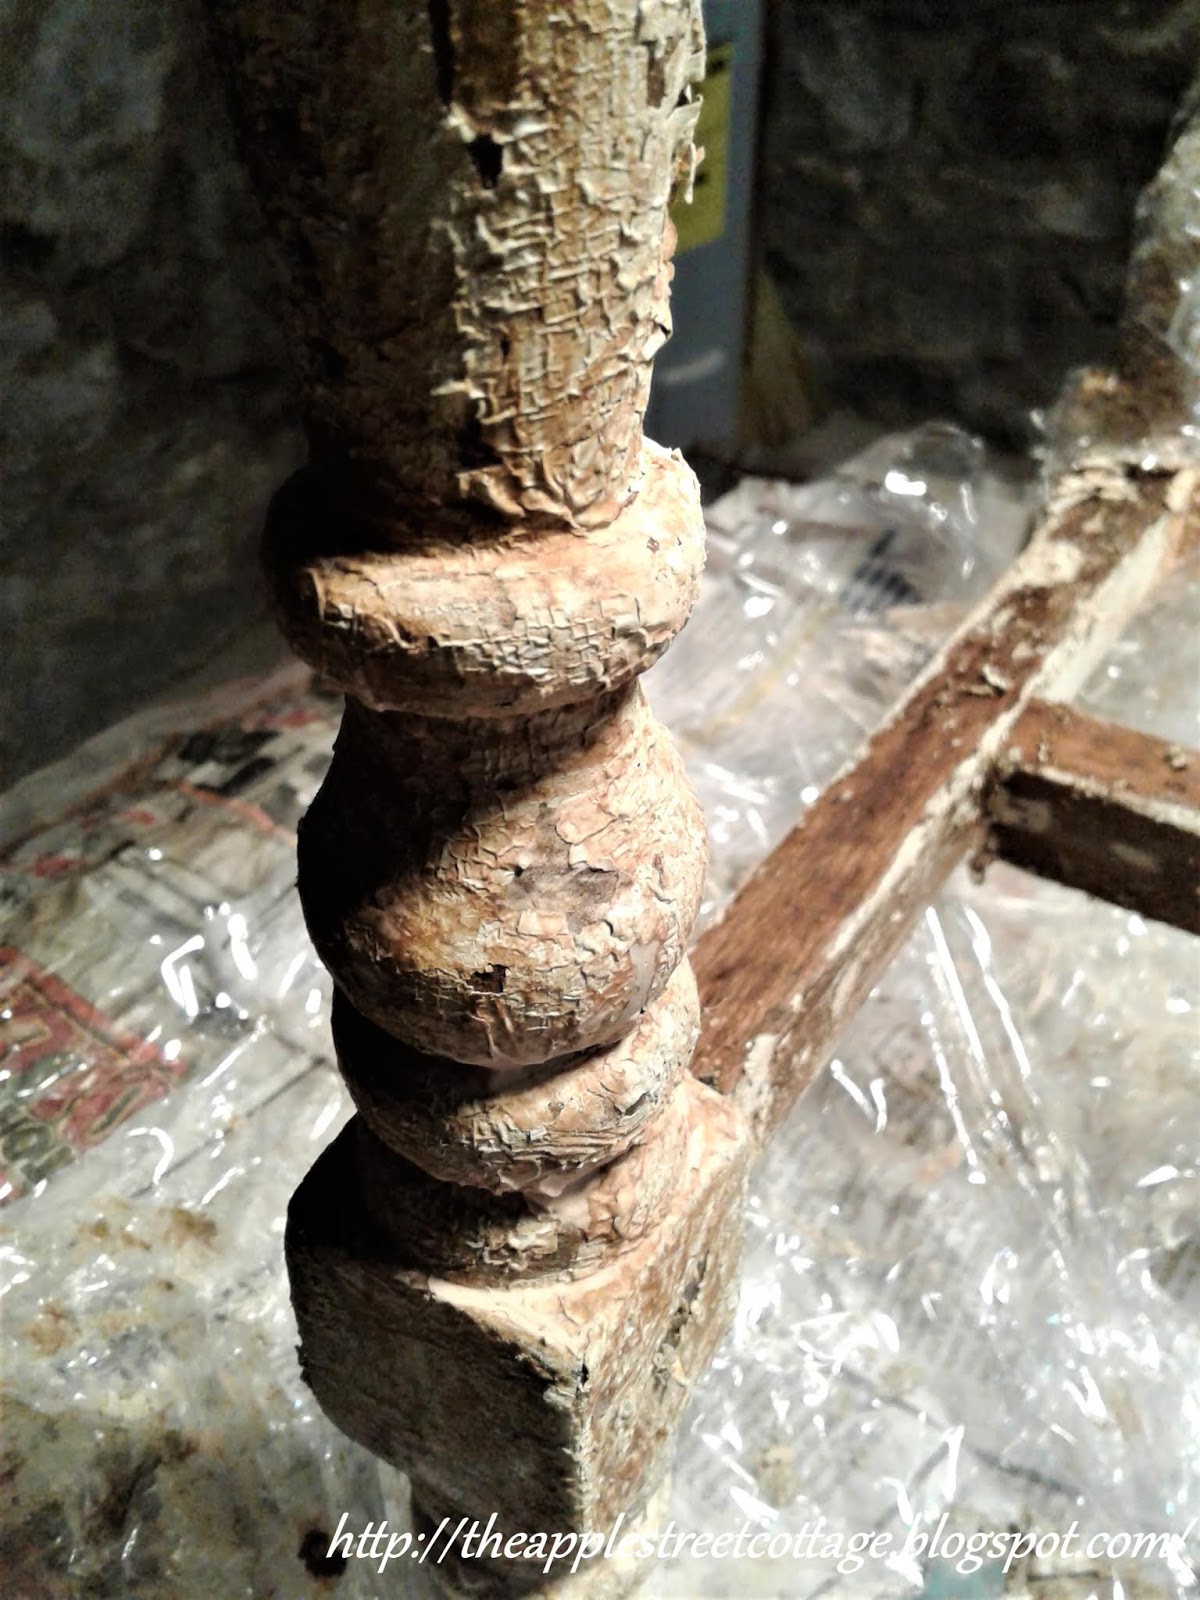
After some scraping and scrubbing, this is what I found:

There looked like a possibility of decent wood to be refinished, so I gave it another coat of stripper:

I did some sanding, and (I thought) it was ready to be finished.

My Mistake!
I grabbed the Tung Oil and started applying it to one of the legs. Sadly, things immediately went south. The oil left the wood color blotchy and uneven. I was so disappointed.
Time for Plan B!
Time for Plan B!
Fortunately, the same day, I spotted another bench at a garage sale listed online. It was painted white but the legs were a much better match for my refinished dressing table. Hubby and I hopped in the car and headed to that sale. The bench was still there and I got it for a great price. I now felt much better about painting the original bench.
Two coats of Peacock chalk paint and I was ready to distress it. After two legs were done, it was clear that this was a mistake. Without the old finish underneath, the distressing just looked messy. No pictures, but, trust me, it looked terrible!
On to Plan C......
Two coats of Peacock chalk paint and I was ready to distress it. After two legs were done, it was clear that this was a mistake. Without the old finish underneath, the distressing just looked messy. No pictures, but, trust me, it looked terrible!
On to Plan C......
One more coat of chalk paint and I had this:
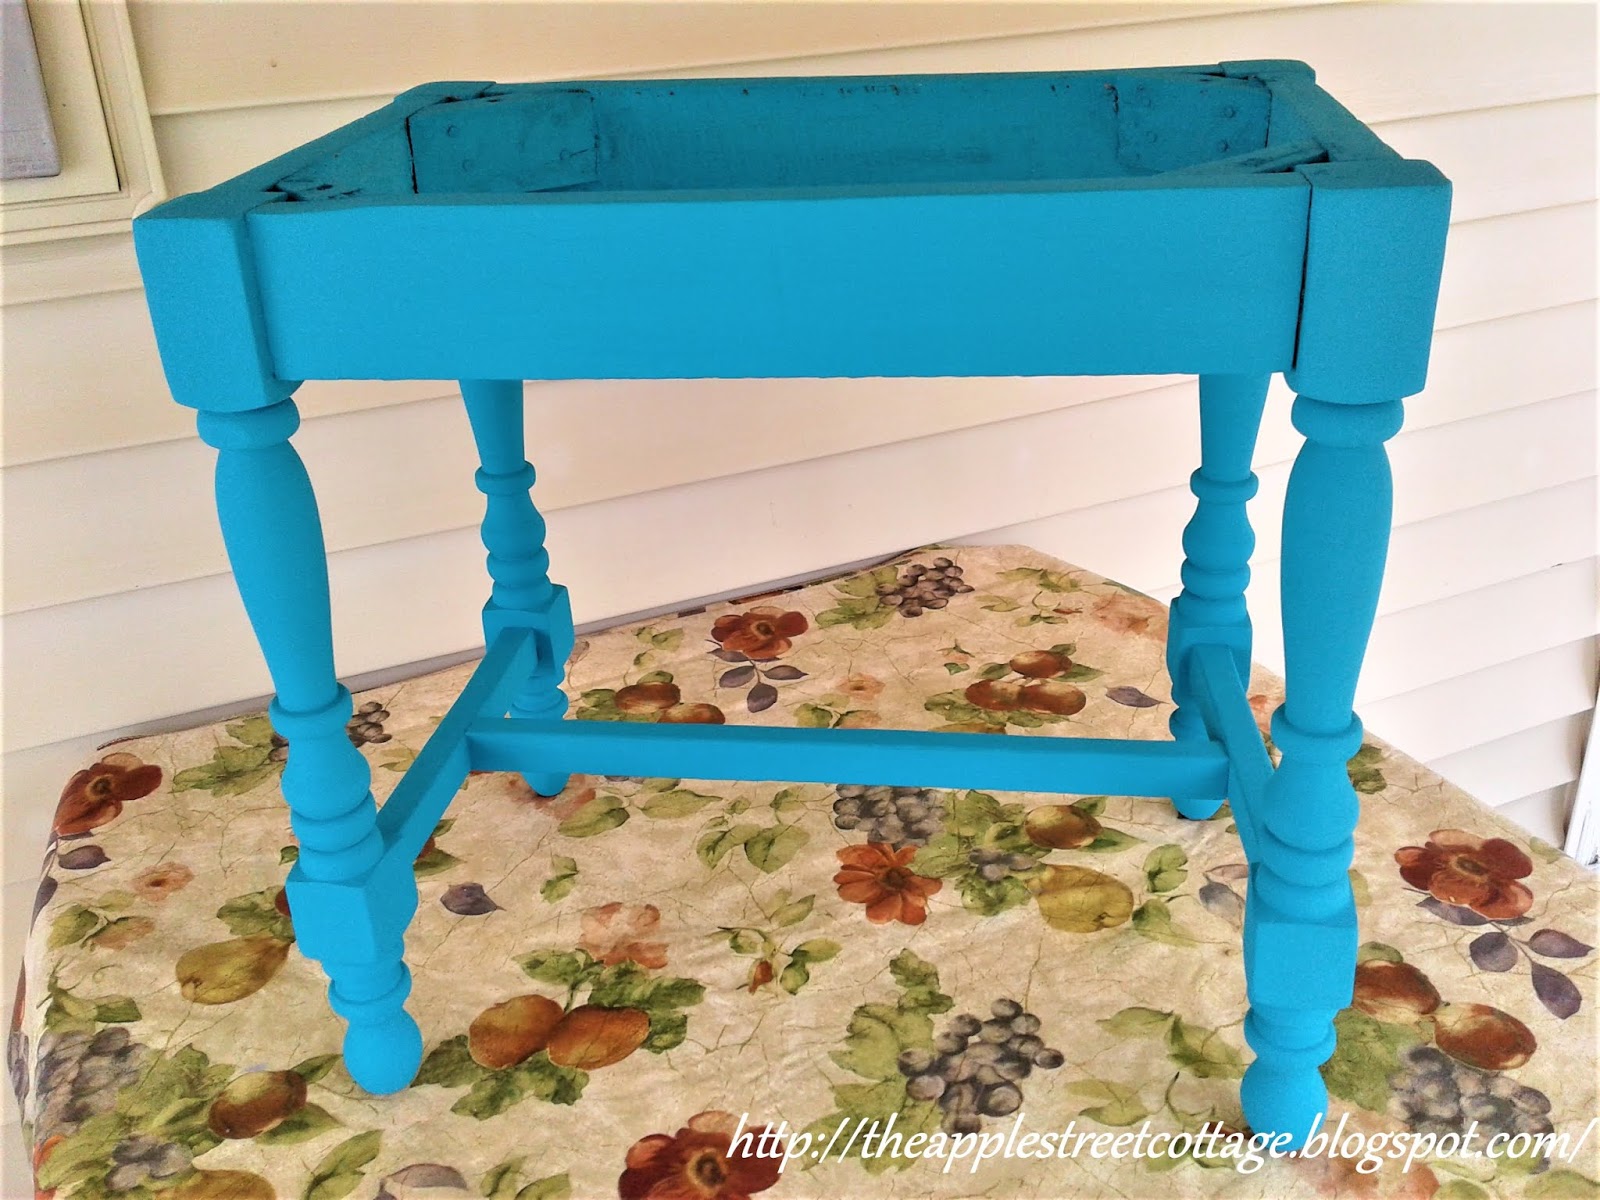
Two coats of polycrylic and I considered it done. Then I had to move on to the seat. I mentioned earlier that it was hot-glued on, but the burlap was stapled.

And there were assorted nails and tacks:

Three layers later:

I was finally able to staple batting to the wood seat.

I cut a piece of fabric, folded over the edge, and stapled that over the batting for a nice finished edge.

Sorry, that one's a little blurry - problems of working and trying to take pictures at the same time!
I used L-brackets to attach the seat to the frame (no more hot glue for this little bench!) and it was done!

One down, one more to go....and so much for plans. I guess it's a good thing there are 26 letters in the alphabet! Do your projects always go according to the original plan? If they do, please let me in on your secret. lol
Stay tuned. I'll share the replacement soon.
Have a great week and thank you for stopping by!
I hope you'll pin, share, comment, and follow. If you click on those 3 little lines at the top right of the blog, you'll see where to find me...or click on 'share'.


That little bench turned out great! No, my projects don't always go as planned but in the end they usually turn out even if nothing like I had planned... like yours!
ReplyDeleteTania
Thank you, Tania. We should probably be neighbors. Think of the fun we'd have changing the plans on all of our projects!
DeleteI love it, Ann! I think it turned out just as it was meant to be. Or C! 😉 Can't wait to see bench number two!
ReplyDeleteThanks, Kim. At the rate I was going, it could have been D, E, or F! As for bench #2, I can't wait to see it either! Lol
DeleteWOW,great job!Thank you for the inspiration!
ReplyDeleteI'm happy you were inspired!
DeleteWell after all of that, it turned out adorable! LOVE IT!!!
ReplyDeleteHappy Pink Saturday!
Cottage Blessings,
Rebecca
Thank you, Rebecca. This one certainly took a few twists and turns!
DeleteI love the color you painted the stool, and the fabric matches it so well! Great makeover! Thanks for sharing at the Snickerdoodle Create Bake Make Link Party!
ReplyDeleteI really like the color too. Thanks for stopping by!
DeleteYou did a fantastic job! Thanks for sharing how it was done.
ReplyDeleteThank you, Janine. I'm happy to share!
DeleteIt's really lovely--any bright blue is a favorite color already and the fabric is nice and bold. Thanks for sharing!
ReplyDeleteThank you, Bernadette. Blue is my favorite color. I'm so glad you stopped by, come back again soon!
DeleteGreat makeover, most would have put it in the bin.
ReplyDeleteI love working on lost causes. and this one was not the worst! Thanks for stopping by!
DeleteYou definitely had to give it a lot of love. It came out really well. Love the color. Great job!!!
ReplyDeleteThank you so much...and I really love the color too!
DeletePlan C came out pretty darn cute. The fabric and color work together so well.
ReplyDeleteThank you, Vanessa. Sometimes it's a good thing there are 26 letters in the alphabet!
DeleteYou really transformed it, Ann! Thanks for sharing at Vintage Charm!
ReplyDeleteIt was just a round-about way to do it! Thanks for stopping by!
DeleteIt’s hard to believe this is the same forlorn bench you brought home. It’s gorgeous!
ReplyDeleteI’d like to invite you to another link party - Creative Compulsions on my blog: https://bijoubeadboutique.com/blog
Thank you, Michelle. I guess it really did have a transformation. Thank you for inviting me to your link party...on my way!
DeleteI love the little bench, especially the color! And no, my projects dont always turn out perfect, but for diy-ers we can usually improvise and make it work! And this one turned out really cute! Thanks for linking up with us at the #GatheringofFriendsLinkParty 2 sharing!
ReplyDeleteThank you, Sylvia. Since projects don't always go as planned, it's a good thing there are 26 letters in the alphabet! lol
DeleteI so admire people who update furniture like this. I'm not sure I have the patience for it. :) Thanks for sharing at the Weekend Blog Hop at My Flagstaff Home. --Jennifer
ReplyDeleteThis is one of those things that you do because you love it. My Dad got me started when I was in Jr. High and I've just kept going. Thank you so much for stopping by!
DeleteIt's lovely, I actually like the solid paint finish, not everything has to be distressed! And that blue is gorgeous.
ReplyDeleteIt all came out ok in the end :-D
I agree. Everything does not have to be distressed....I really like the color too!
DeleteMy eyes went right to that pretty blue color and lovely fabric! I have done many projects and find that most don't end up exactly as I'd planned. There is always room for your plans to evolve and often the final product is better than the thought I started with. Today I am off to refinish a sad looking bookshelf...maybe paint it blue but we will see when I strip it!
ReplyDeleteI always say, a piece 'talks' to you as you work on it, telling you what it wants to be. This one certainly had other ideas! Good luck with your bookshelf!
DeleteHappy Pink Saturday, Ann. Thank you for joining in to make Pink Saturdays special.
ReplyDeleteI love, love, love your new bench. And, the fabric is wonderful. Paisley always does it for me. This post is being featured on my Pink Saturday post this week as "the one with the most clicks".♥
Thank you so much, Beverly. I'm always happy to join you at Pink Saturday and I'm thrilled to be featured!
DeleteAnn, so goes the diy life, right?! Thanks for sharing at TTA... love the paisley fabric you used!
ReplyDeleteAlways, Julie, always. But that's what keeps it interesting!
Delete