The Painted Hutch
After several weeks of life with a paint brush in my hand, I am proud to say, "The hutch is done!"
Party In Your PJs
Creative Spark
Thursday Favorite Things
Create It Thursday
Shabbilicious Friday
Handmade Hangout
Homemade and Handcrafted
Friday Favorites
Small Victories Sunday
Trash to Treasure
I've been searching for one since we moved into the cottage about a year and a half ago and finally found it last fall. It was your typical 1970's two-piece, dark pine hutch, and it was mine! After wrestling it into the basement work area, it was ready for a makeover!
After all that work to get it in there, I wasn't going to ask my husband and neighbor to stack the pieces for a photo, so, here it is in all it's 2-piece glory!
I started on the bottom half by removing the doors, drawers and all of the hardware. The top was sanded, stained a dark walnut, and sealed with two coats of polycrylic. Here's a peek:
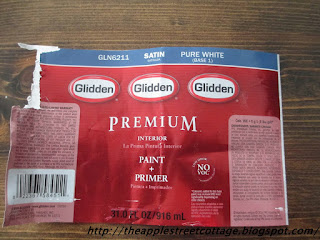
The next step was to scuff everything with 220-grit sandpaper and give it two coats of primer. After that, two coats of paint were applied. Here's what I used:
This part was set-aside to "cure" and it was time to start the top. Once again, I removed the doors and hardware, along with the glass. The same process was used to makeover this part.
The hardware was cleaned (you can read that post HERE. and repainted with spray paint.
I noticed a bit of "sparkle" as I was spraying and decided everyone could use a little more sparkle in their lives! Here are some close-ups:
Now, you may be wondering why it took so long to finish this project. If you remember, I found the hutch last Fall. I finished the bottom half in early November and then we did some traveling for the holidays. The top was finished in January and, soon after, I had carpal tunnel surgery. So, it was weeks of work stretched-out over a few months!
I'm very happy with the end product and have been working on washing my glassware, etc. Be sure to stop back later this week to see the hutch "styled".
Thank you for stopping by the Cottage. I hope you'll follow, share and pin! Have a wonderful week!
Linking to:
Wonderful WednesdayParty In Your PJs
Creative Spark
Thursday Favorite Things
Create It Thursday
Shabbilicious Friday
Handmade Hangout
Homemade and Handcrafted
Friday Favorites
Small Victories Sunday
Trash to Treasure


Three cheers...Touch`e....Bravo! I still have s few pieces that I just can't seem to get to and re-finish. What an accomplishment for you to be able to admire and enjoy for many years. Enjoy!
ReplyDeleteJP
Thank you, JP. It took a while, but it was worth it!
DeleteWow!! That doesn't even look like it's possibly the same piece. I LOVE it! you did a terrific job! Thanks so much for sharing at Dishing It & Digging It!
ReplyDeleteThank you, Lori. It was a labor of love!
DeleteBe sure to come back to see it "styled". I'm waiting for some sun to take the photos.
The hutch looks fabulous! I love the paint on the hardware. I may have to find something to use that on!
ReplyDeleteThank you, AnnMarie. I wanted a different look than the oil-rubbed bronze that is so popular right now.
DeleteI'm pretty pleased with how it turned out!
Ann
Great Job! I am in the process of repainting a chest of drawers that belonged to my parents. Did you use any type of finshing coat after you painted it to "seal" it? If so, what did you use.
DeleteThanks!!!
Marilyn
Thank you, Marilyn. I did not use any finish coat or sealer over the paint. I always worry about the sealer 'yellowing' - even if they say it won't. I look at it this way, if it starts to chip, I'll break out the sandpaper and distress it. It will be a whole new hutch!
DeleteSo glad you stopped by, I hope you'll follow and stop by again soon!
Ann
It's amazing one a coat of paint can do! Love the new color. Thanks for sharing at Thursday Favorite Things Blog Hop!
ReplyDeleteThank you so much! It was a labor of love.
DeleteSo glad you stopped by - be sure to come by again soon!
Ann
This is simply gorgeous! :)
ReplyDeleteAww, thank you!
DeleteI hope you'll stop back to see it "styled".
Ann
It's stunning! I would love for you to share this at the Friday Favorites link party going on now.
ReplyDelete~Bonnie
http://www.oursecondhandhouse.com/2016/03/friday-favorites-week-317.html
Thank you, Bonnie, I'm happy to share!
DeleteI hope you'll stop by again soon.
Ann
Wow I love the make over. I have one to do and you have given me inspiration.
ReplyDeleteBev
Loved it! I love the dark tabletop detail, it really provides a nice contrast to the white paint! Your post will be featured this week on Friday Favorites at mustlovehome.com. I would love for you to stop by and see your feature!! Hugs- Christine at Must Love Home
ReplyDelete