My Planner Makeover
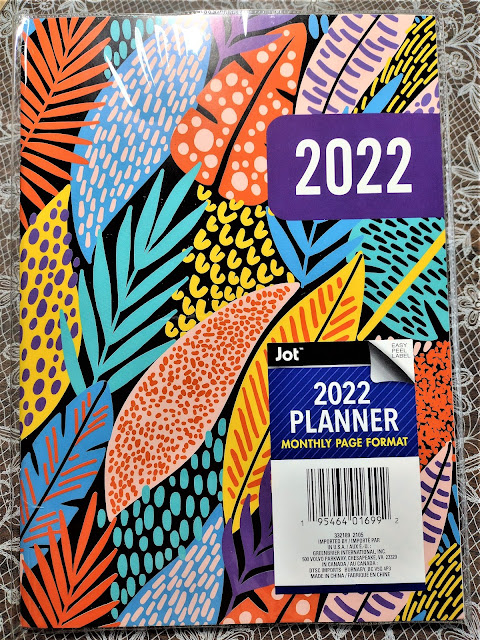
If you're anything like me, you have a planner or a calendar to help keep your life organized. Even though I add a lot to the calendar on my phone, I still like being able to look at a paper version. As a Literacy Specialist, my planner was my life. Every meeting, workshop, in-service, classroom visit, etc. that I was in charge of was there, along with everything I needed to do to prepare for it. Now that I'm retired and life is much simpler, a dollar store planner works just fine for me. The only problem was I didn't like the look of it.
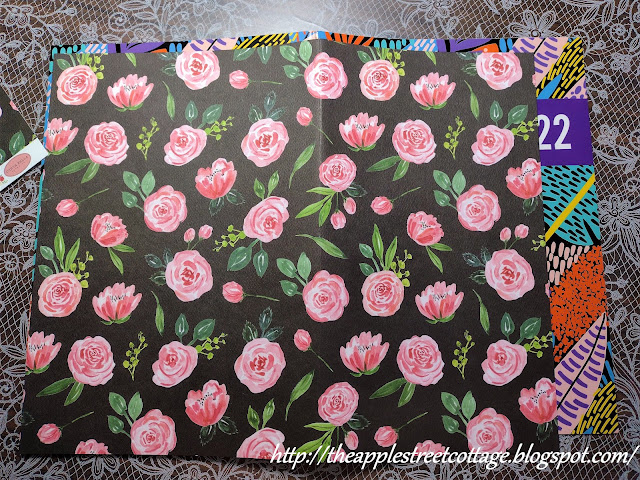
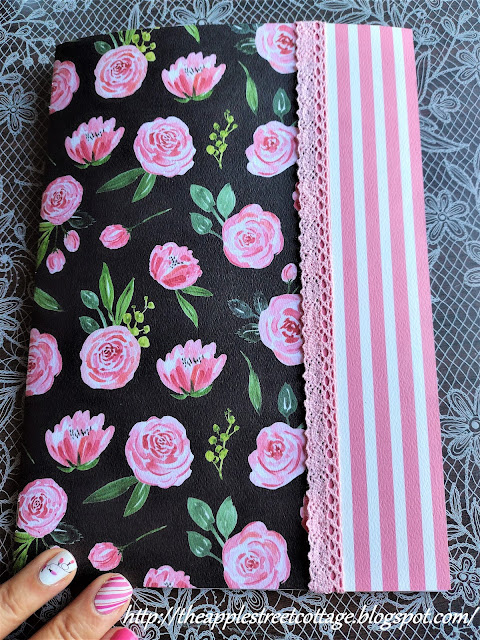
So I grabbed some scrapbook paper and supplies from the craft room to make it 'A Little More Me'!
Since the scrapbook paper was 12x12, it wasn't going to be wide enough. I measured it against the original cover and scored it with the short side on the front.
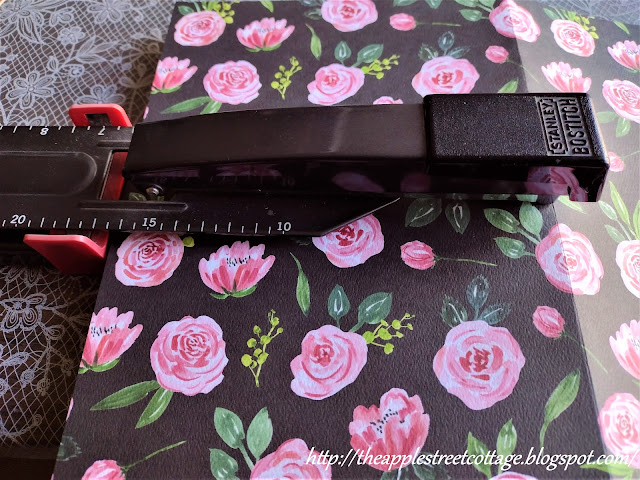
I removed the original cover and attached the new one with my long-reach stapler. If you don't have a long-reach stapler, you can glue your new cover directly to the original one.
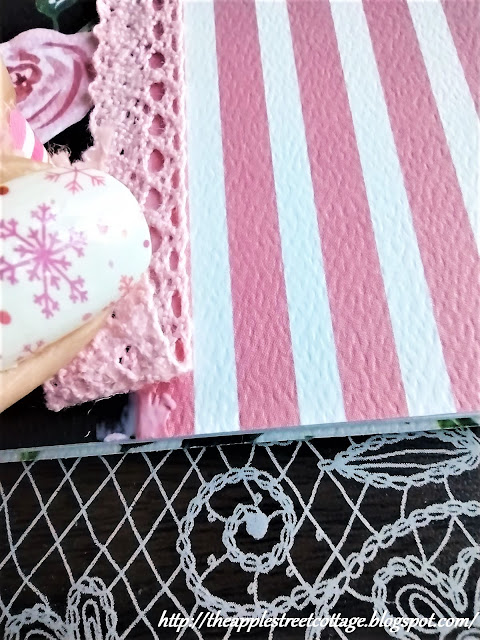
In order to make the front cover wide enough, I glued-on a piece of coordinating paper.
A piece of lace trim was added to blend the two papers together.
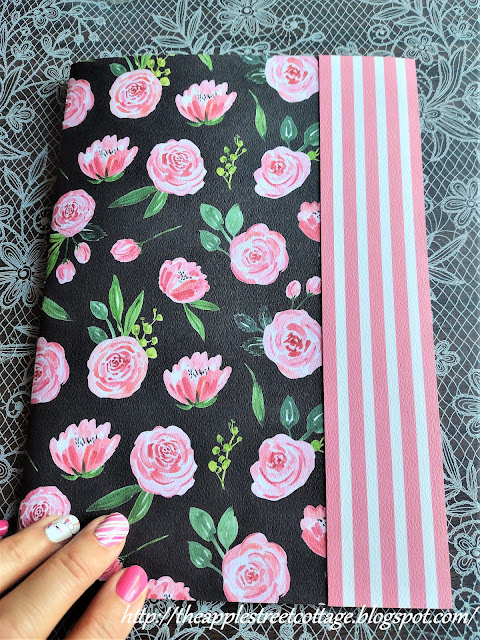
Much better!
The inside front cover needed a little work. The two papers really didn't match and you could see the edges of the lace trim.
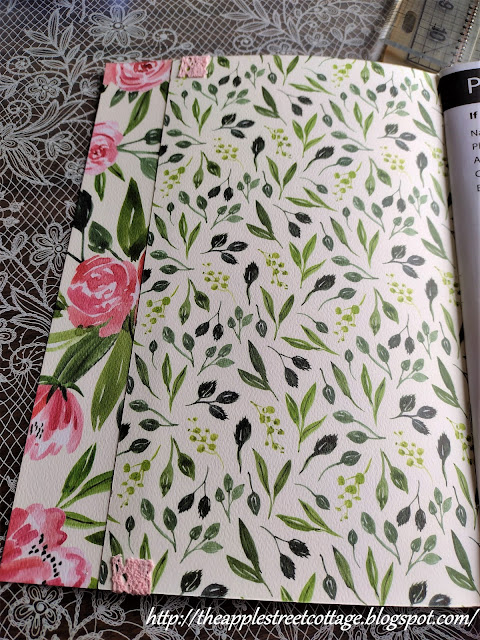
So I cut the original cover down and glued it to the inside.

Next up was a little embellishment, compliments of the scrapbook paper pack. I took a sticker and made a double frame for it.
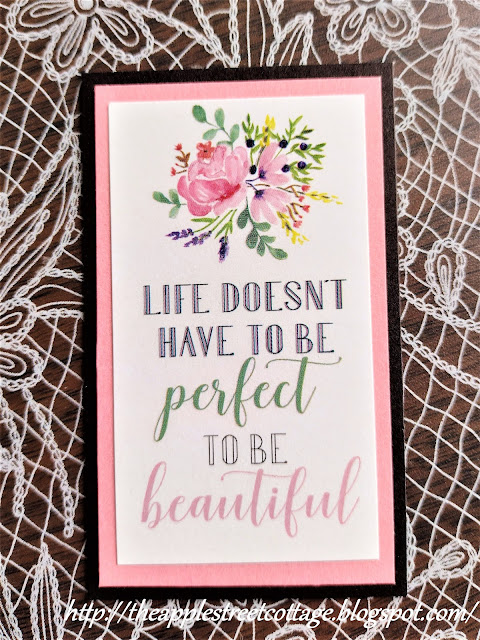
Then it was added to the planner.

So much better than the original. Don't you think?
So, the next time you see a planner or notebook that has a cover you aren't crazy about, buy it and change it up to suit you!
I hope you'll pin, share, comment, and follow. If you click on those 3 little lines at the top left of the blog (on the Home page), you'll see where to find me...or click on the icon below to share.
Featured at:


So pretty!
ReplyDeleteThanks, Patti!
DeleteOh my goodness, this is so nice!
ReplyDeleteTania
Thank you, Tania....easy makeover, too!
DeleteAnn, this is beautiful and so creative. I love that you dolled up the inside, as well. Great nails, too! 😉
ReplyDeleteThanks, Kim. The inside really needed a little love...and I knew you'd like the nails!
DeleteThis is great! And the instructions are so clear and easy - pinned. Thanks for sharing at the Share the Wealth Party! I appreciate it - Have a great week.
ReplyDeleteThank you, it was an easy makeover - just how I like them!
DeletePrecioso!!
ReplyDeleteBonito y elegante
BESOS... Desde Sevilla- España
Thank you so much!
DeleteI absolutely have to have a planner, I ordered one that I like but I love how yours turned out and maybe next year, I'll be something cheap and then make it look beautiful as you did. I'm not sure I'm that talented (in that way) though. ☺️
ReplyDeleteI'm sure you could do it - the scrapbook papers did all the hard work!
DeleteYou're right, that is a great planner, but the covers are meh. I always buy one. Great job showing how to fix them. thanks
ReplyDeleteYou're very welcome, Mary. It's an easy way to make them pretty again!
DeleteThis is such a cute makeover. The planner looks much better, now. I like how you added the lace and the graphic embellishment. They complement the scrapbook paper perfectly.
ReplyDeleteThank you, Carol. I'm so glad you like it!
DeleteThis is such a sweet makeover! I've never thought to do such a thing, but you really made that planner your own and I'm sure you'll love using it!
ReplyDeleteI had to do something with it...that original really needed work. Thanks for stopping by and come back again soon!
DeleteThis is fabulous Ann. I love the combination you used. Very pretty!
ReplyDeleteThank you so much, Cindy. I always gravitate toward pink and black.
DeleteLove this idea! Making the journal your own will make it more appealing to use. Zenda
ReplyDeleteI agree. It's always important to make things 'your own'!
DeleteAnn,
ReplyDeleteI love how you embellished your planner!! I do the same and write down things in a planner and make weekly and daily To Do Lists...Even though I am retired, I find it necessary to keep me focused on what I want to do and what I do get accomplished...Checking off a task done is a great feeling and keeps me on track and motivated! I also love the colors that you used...Thanks so much for your visit!! Stay safe, healthy and happy!!
Hugs,
Deb
I am a list maker too, Debbie and this planner has a spot for that. Of course, there still may be a few post-it notes around my computer...lol
DeleteThanks for stopping by!
Your planner embellishment is so pretty, Ann! You inspired me to look at the dollar store first for a much less expensive planner than where I normally shop for my annual planners and pay way too much moolah. I'm currently working on a similar project and I'm hoping mine turns out half as nice as yours.
ReplyDeleteThanks, Marie. You can't beat a planner for a dollar. Looking forward to seeing yours!
DeleteAnn, this is so pretty and a great makeover! Love the colors and pattern you picked. I need to remember this post for my next planner.
ReplyDeletehugs
Rachelle
Thank you, Rachelle. I always seem to gravitate to black and pink!
DeleteThat is too gorgeous to throw out at the end of the year though!!
ReplyDeleteThat's so sweet of you to say! Maybe I can take the staples out and attach it to a new one next year...
DeleteHola Ana, es la primera vez que paso a visitarte y me ha encantado tu blog, los trabajos son muy bonitos y originales. Éste en concreto me parece muy bonito, los papeles que has utilizado son muy bonitos y la puntilla que has seleccionado para unirlos es muy adecuada. La pena es la parte de dentro que hayas tenido que cubrirla con el papel blanco, pero igualmente ha quedado estupenda.
ReplyDeleteFelicidades, besicos
Thank you so much, I'm glad you like it!
DeleteWhat a lovely makeover. I love the quote!
ReplyDeleteMichelle
https://mybijoulifeonline.com
Thank you, Michelle...I do too!
DeleteI'm with you -- I was a scrapbooker in another life and love gussying up calendars and books. I love the paper and sticker you used -- lovely! Thanks for sharing at Vintage Charm. xo Kathleen
ReplyDeleteThank you, Kathleen. Papercrafting and scrapbooking has taken a back seat to other things lately around here; but there are SO many pictures waiting! lol
DeleteThe makeover planner looks more your style than the original cover did. This year my planner cover is plain and I should give it some personality too. #HomeMattersParty
ReplyDeleteThank you, Donna. It was so easy to make-over!
DeleteWow Ann, what a fabulous make-over!
ReplyDeleteThank you for sharing your planner makeover at Create, Bake, Grow & Gather this week. I'm delighted to be featuring it at tonight's party and pinning too.
Hugs,
Kerryanne
Thank you so much, Kerryanne!
Delete