A Little Landscaping
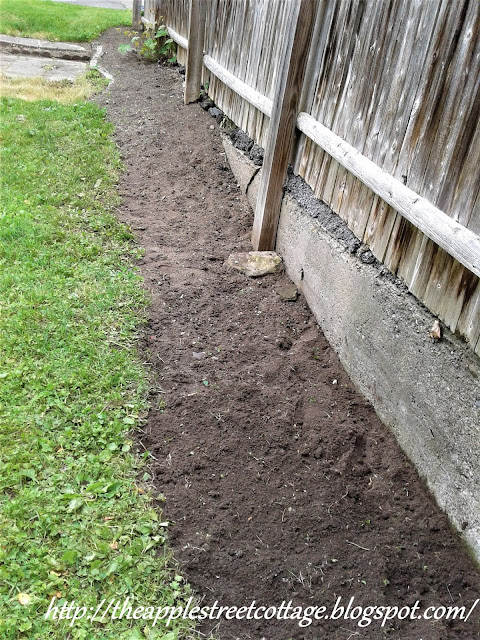
Welcome back! We've been very busy with lots of little projects around the cottage, but one big one - that is still in progress, is some landscaping. It all started along the fence, where I could see evidence of a garden long ago. There was some concrete edging, but no plants whatsoever, just weeds. So I got to work:
Not bad when you consider this whole section looked like this when I started:
There were lots of weeds, rocks, a few patio blocks, junk, and a few treasures from a child:
I just love how old places leave things behind and tell you a story!
While I was busy tearing out weeds and uncovering treasures, I noticed that the patio blocks at the bottom of the porch steps extended further than originally thought, so I got out my weed-killing spray to make uncovering them a bit easier. Notice the brown grass:
Yes, instead of about 6 feet of patio block, we had about 12!
The section from the porch railing, all the way to the right, was now uncovered.
But we were just beginning... If you go back to the dead grass picture, you'll notice a chunk of concrete with some scalloped edgers along the bottom. My husband decided it was time to find out what else was under there. And, so it began:
Underneath all that grass and dirt was a larger concrete slab. He uncovered it, along with some more patio blocks (square, this time) and used the scalloped edgers and patio blocks to form a step.
After finding four of the square patio blocks, he created a walkway to the driveway.
Did you notice all of the stone on the right? That was another part of the project. In an effort to divert water away from the house, my husband dug out that section of lawn and graded it so the water would travel down and away from the foundation. It is lined with landscaping plastic and stone. There is still more work to be done on that project, but, that will be another post.
As we looked at this project, I suggested finishing it with stone to avoid having to mow it. Hubby didn't really care for that idea, so then I suggested continuing the garden to this area. That one he liked and he immediately started scraping off sod!
We sure know how to make a mess, don't we?
In the midst of all this digging and grading, another treasure was uncovered:
At first, all we saw was the scalloped edge and I thought it was an old gravestone. It was not unheard of to use gravestones as sidewalk pavers back in the day. Fortunately, as we pulled it out, it became clear that it was just a large, flat stone...Whew!
But, we did find some coal:
A little more digging and grading and we were just about ready for plants:
Since we have a few cats that wander the neighborhood, I wanted to discourage them from using our garden as a litter box. We spread-out chicken wire and fastened it with landscape staples:
In order to put in plants, holes had to be cut in the chicken wire. This was a tedious job, but worth it to keep the kitties away!
Next came the plants:
The final step...mulch:
The area in front of the step is still a 'work-in-progress'. That's part of the drainage for the stone on the right. As soon as we get some rain we'll be able to see how it works and what else needs to be done. In the meantime, there's a little bit of garden and the landscaping continues.
We love the fact that we were able to reuse the materials that were buried for so long. They are part of the story of this little house and we can't wait to see what else it has to tell us!
Thanks for stopping by and making it through this long post. Have a great week and come back again soon!
I hope you'll pin, share, comment, and follow. If you click on those 3 little lines at the top right of the blog, you'll see where to find me!


How fun finding all that hiding in your yard! It's looking great too and how clever to use chicken wire to keep cats out. Fortunately I don't have any stray cats (that I know of) in my neighborhood.
ReplyDeleteTania
And we keep finding more! The chicken wire is the one thing I've found that works...keep it in mind in case any kitties show up, Tania!
DeleteAmazing! You 2 are hard workers! My back hurts just looking at your photos! 8^)
ReplyDeleteThank you so much, Mary. Believe me, ibuprofen is our friend! LOL
DeleteGreat changes, hard work and well worth the time and effort.
ReplyDeleteJoy
Thank you, Joy. We still have a lot to do...we're already looking at the sidewalk and saying it needs more work! Stay tuned!
DeleteHard work on our yards is always SO rewarding! Thanks for sharing with us at the To Grandma's House we go link party!
ReplyDeleteIt sure is, Tarah! This project is far from done, though. We are working on getting the water to drain away from the house. My poor husband was out in the pouring rain making adjustments...waiting for the next downpour to tell us what else needs to be done!
DeleteThanks for stopping by.
Quite a job, but what an accomplishment. It will be beautiful as the plants become established! Thanks for sharing with SYC.
ReplyDeletehugs,
Jann
Thank you, Jann...and we're still not done - there's still work to be done for drainage. We've been getting rain and the plants are loving it!
DeleteSo glad you stopped by, come back again soon, won't you?
Great blog! I really enjoyed reading about the landscaping tips and ideas you shared. It's evident that you have a passion for creating beautiful outdoor spaces. I particularly loved the section on sustainable landscaping—such a great reminder of how we can enhance our environment while being eco-friendly. Keep up the fantastic work, and I look forward to reading more of your posts! THEJEMBE
ReplyDelete