Posts

Showing posts from December, 2018

Christmas Through the House

Image
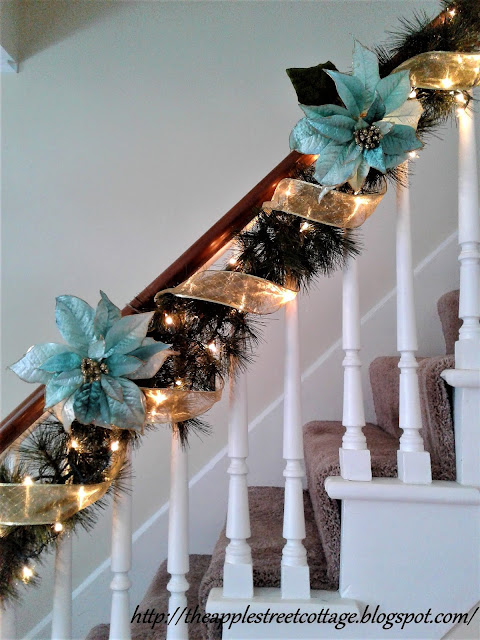
It's almost here and I finally got the house decorated for Christmas.  For whatever reason, it was a slow process this year, but it's done.  Here's a peek: The stairs have been decorated with garland, gold ribbon, and these beautiful blue poinsettias that I found last year at Michael's: There's no fireplace or mantle here, so my Lenox Santa sits poised on top of the china cabinet surrounded by garland, red and gold Christmas bulbs, and pinecones: My grapevine wreaths have been decorated for the holidays: This little paper house was made several years ago, but it still comes out every year.  The top comes off, so it's actually a box: We call our tree the "Charlie Brown Christmas Tree".  We bought it several years ago for $20 at Walgreen's.  It looks so humble when it comes out of the box, but when the lights and ornaments are added it's beautiful.  This is not a themed tree.  It is not flocked.  It doesn't have a high ti

Wine Cup Upcycle

Image
A promise is a promise, so here it is...the wine cup upcycle.  If you follow me here, you'll remember the post that showed you how to remove adhesive from sticky labels.  I used the wine cups as an example and I promised to show you how I upcycled them.  If you missed it, click HERE .  Let's take a look at my first project: I put an empty wine cup in the middle of my Pairpoint Silver Bowl , surrounded it with Pinecones and a little greenery (yes, it really is blue...I think it's a blue spruce shrub)) from the garden.  I added a set of 10 battery-powered lights to the bowl and a battery-powered tea light to the cup.  Have another look: Here's a better look at the bowl: I didn't stop there, though.  Out came some craft supplies... Brushed some Mod Podge on the cup: Applied some paper napkins, don't forget to separate the layers so you only have one! Smoothed the edges: Until it looked like this: The top edge was trimmed off, a secon

Christmas Countdown Box

Image
It's December so it's time to start sharing some Christmas projects.  This sweet little Countdown Box was made several years ago, but can easily be replicated today.   The original box and cards are no longer available, but, no worries, I found this cute little box at Walmart that will work perfectly.  Grab some chipboard from your local craft store and you're good to go! The original box was white, so I inked the edges and glued scrapbook paper to the top and sides.  A little pom pom fringe and a button were added to dress it up and it was done.  Since you've already run out to the store and purchased that cute box I just showed you, you are ready to decorate the cards.   I typed out my 24 activities ( which I will share at the end of this post) and printed them on cardstock.  They were cut to size, and stamped.  After inking the edges and adding scrapbook paper to the cards, the activities were glued on.  I also added numbers with a circle punch and stamps.